KnittingGuides.com: The knitted work on this handbag makes it the perfect gift to a dear friend or a near relative. When the small crochet squares are joined in together to make a bag, it looks absolutely adorable. A slip stitch with the wrong sides facing together is used to make this bag for the desired pattern as shown in the picture.
Abbreviations:
CH chain
SC Single Crochet
DC Double crochet
HDC Half double crochet
Step 1: Materials
DK weight yarn
4 mm hook
yarn of cotton acrylic blend
130 meters of the solid color and 200 meters of the multicolored yarn
Handles measure 32 cm long from tip to tip are of fake leather.
Step 2: Pattern
As far as the measurements are concerned, each square messed 7.5 cm on the side and the bag is 29 cm at the widest point and 24 cm at its highest point.
Round 1: Make a magic circle, chain 3 and DC 12 into it.
Slip stitch in the first DC to complete the round. [12 stitches]
Round 2: CH 3, DC 2 into each stitch. Slip stitch in the first DC to complete the round. [24 stitches]
Round 3: CH 3, DC 2 into same stitch, DC 1 in next stitch, *DC 2 in next stitch, DC 1 in next stitch*. Slip stitch in the first DC to complete the round. [36 stitches.]
You should now have a circle made up of three rounds. If you are using the same color yarn for the frame then continue if not then cut off the yarn and join a new one in any stitch.
Round 4: Squaring the circle
CH 1, SC in same stitch, SC, HDC, HDC, DC 2 in next stitch, CH 2, *DC 2 in next stitch, HDC in next two stitches, SC in next 3 stitches, HDC in next two stitches, DC 2 in next stitch, CH 3* (repeat 3 times), DC 2 in next stitch, HDC in next two stitches, SC in next stitch. Slip stitch into first SC to complete the round.
Step 3: Finishing
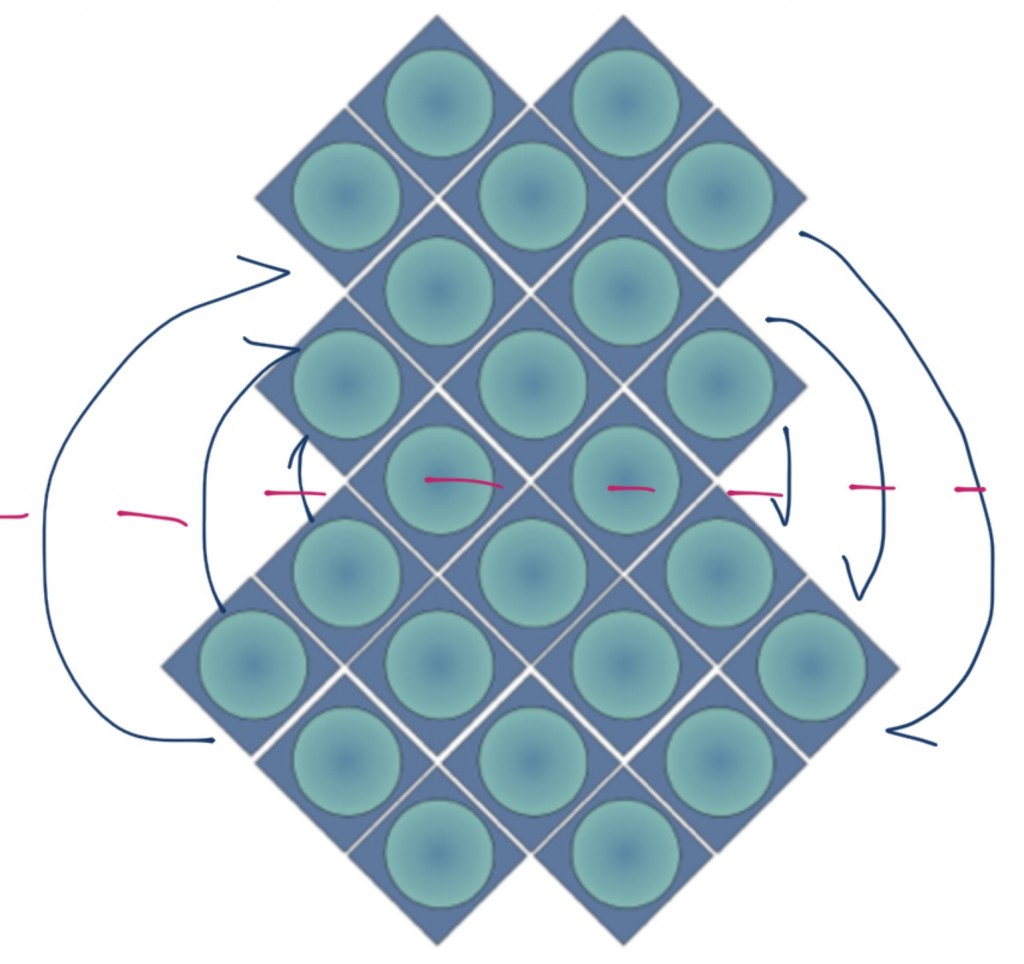
It is recommended you finish all the circles, then all the frames, then weave in all the ends. This works more like an assembly line and saves the time of stopping, putting down the hook, changing yarn, finding scissors and all that. Now comes the fun part, joining the squares, the pink line is the fold line and the dark blue lines show you which side of which square joins where. Finally sew on the handles and enjoy your bag.
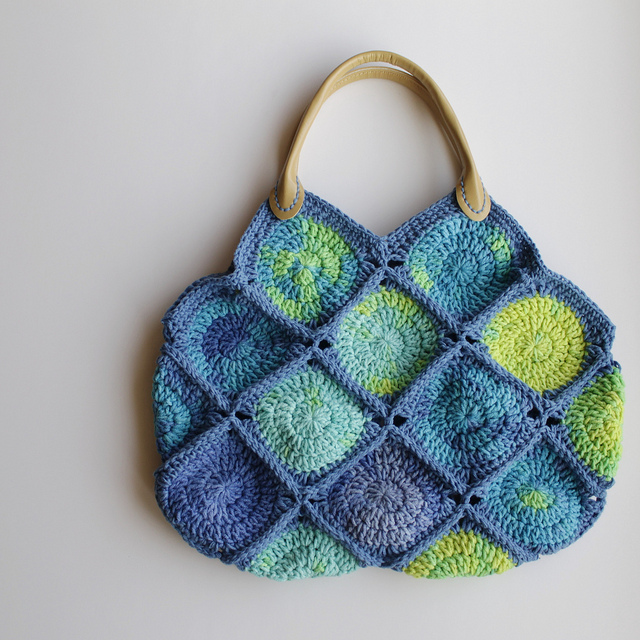
Photo credits & source: chocolatemintsinajar.com