
How to Cast On Knitting: Four Easy Methods, Explained Step by Step
Learn the slip knot, the long-tail cast on, the knitted cast on, the cable cast on, and the backward loop, with clear diagrams, honest tips, and fixes for the mistakes almost every beginner makes.
Some links below are Amazon affiliate links. If you buy through them, we may earn a small commission at no extra cost to you.
Every knitted thing you have ever worn, from a scratchy school scarf to the softest baby blanket, began with the same quiet moment: a loop of yarn on a needle. That loop is the start of a row of stitches, and the way you make that first row is called casting on. It sounds technical, but it is really just a small, repeatable hand movement, and once your fingers learn it you will barely think about it again.
The tricky part is that there is not just one way to do it. Ask five knitters how they cast on and you may hear five different answers, each delivered with total confidence. One swears by the long-tail method, another prefers the knitted cast on because it needs no counting of tail length, and a third uses the backward loop because it is the fastest thing she knows. They are all right, and this guide will show you why.
Below you will find four reliable methods, each broken into small steps with a diagram so you can see where the needle goes and where the yarn travels. We start with the slip knot, because every method shares it. Then we move through the long-tail, knitted, cable, and backward loop casts on, compare them honestly, and look at stretchy variations for hats, cuffs, and socks. Along the way we cover tension, the right needle size, the most common mistakes, and how to repair them without tearing everything out.
If you are brand new to the craft and want the full picture before you start, our guide on how to start knitting pairs nicely with this one. Grab a pair of needles and a smooth, light-colored yarn, and let us begin.
What Casting On Really Means (and Why It Matters)
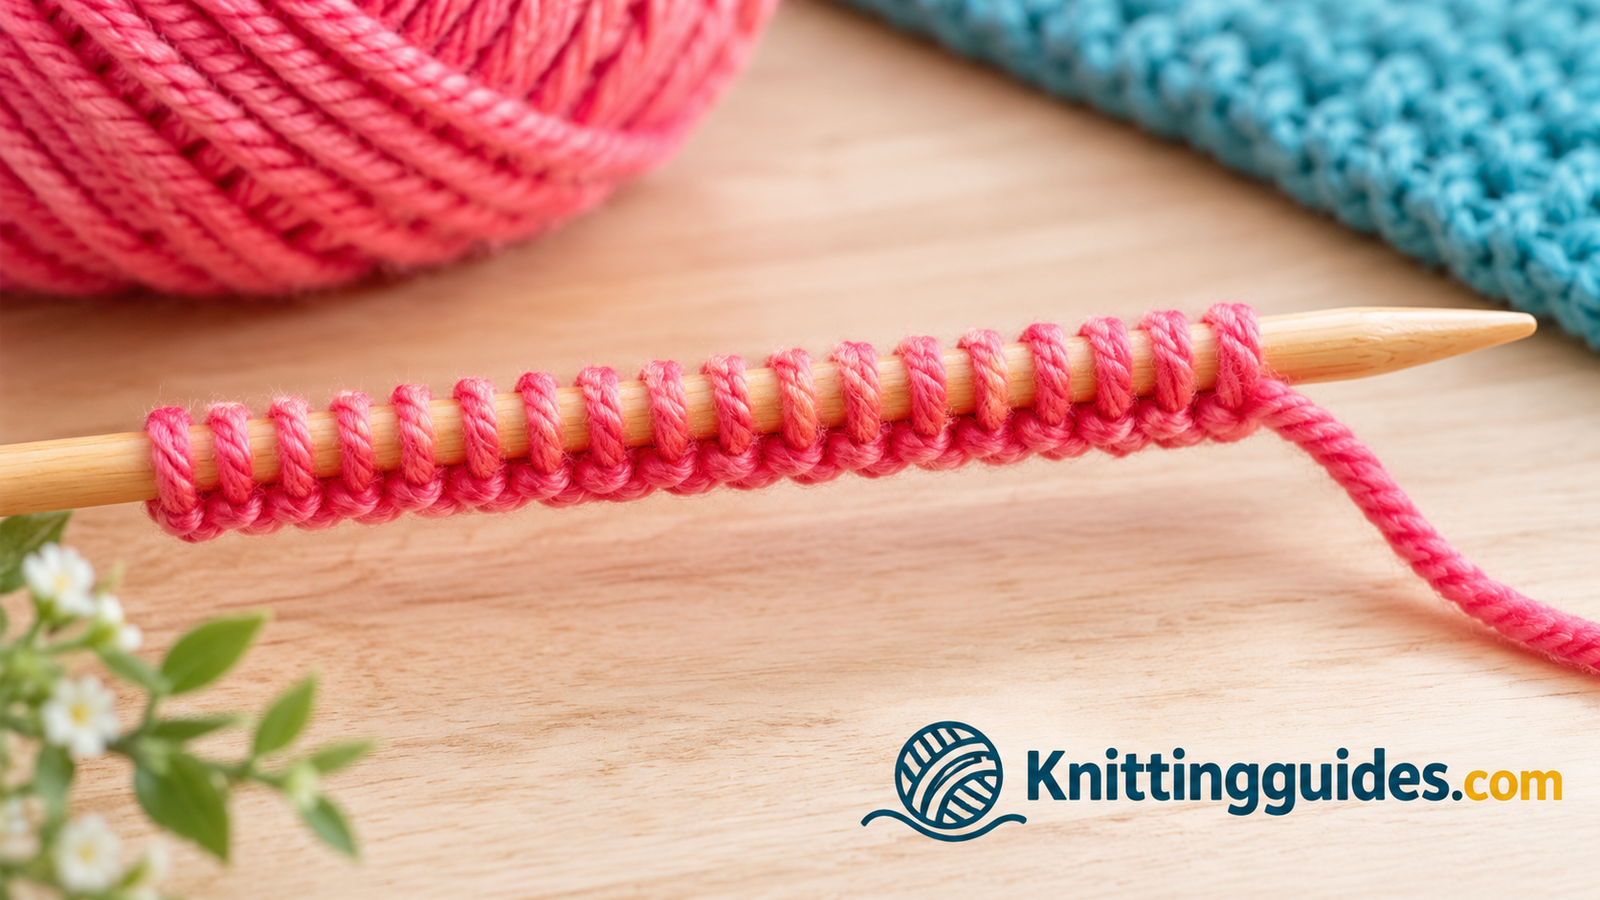
Casting on is the process of creating the first row of stitches on your needle. Before you can knit or purl anything, you need live loops sitting on the needle that you can work into. Think of it as laying the first course of bricks before building a wall. Everything that follows rests on it.
Each loop on your needle is one stitch. When a pattern says “cast on 30 stitches,” it simply means you should make 30 loops on the needle, counting the slip knot as the first one in most methods. After that, you knit your first row by working into each of those loops one at a time.
Why the cast on edge deserves attention
Beginners often rush through casting on because it feels like preparation rather than real knitting. But the cast on edge stays in your finished piece forever. It becomes the bottom of a sweater, the opening of a hat, or the edge of a scarf, and it affects how the piece looks, stretches, and wears.
A cast on that is too tight will pucker the bottom of your work and make it hard to put the needle into the stitches on the first row. One that is too loose will leave a floppy, ragged edge. A good cast on sits comfortably between the two: firm enough to hold its shape, loose enough to match the rest of your knitting.
The qualities that separate one method from another
Cast on methods differ in a few important ways, and understanding them makes choosing easier:
- Stretch. Some methods give an elastic edge that bounces back, which is ideal for hats and cuffs. Others make a firmer, less stretchy edge that holds its shape.
- Appearance. The long-tail cast on leaves a tidy, braided-looking edge. The knitted cast on looks like a row of small knots. The backward loop has a loose, slightly lacy look.
- Speed and effort. The backward loop is the quickest. The long-tail takes a little practice but is fast once learned.
- Tail management. Methods like the knitted and cable cast ons use only the working yarn, so you never have to guess how long a tail you need.
- Where you can use it. Some methods work only at the very start of a project. Others, like the cable and knitted casts on, can add stitches in the middle of your work.
No single method wins every contest, and that is the good news. Once you know two or three, you can pick the one that suits each project, the way a cook picks the right knife for the job.
How patterns tell you to cast on
When you open a pattern, the cast on instruction is usually the very first line, and it can be as short as “cast on 40 stitches.” Many patterns do not name a method at all, which means you are free to use the one you like best. Some patterns do ask for a specific technique, such as a stretchy cast on for a ribbed brim or a provisional cast on for a seam that will be joined later. When that happens, the designer is choosing the method for a reason, so it is worth following their lead.
It also helps to know that a pattern’s stitch count is a promise about how the piece will fit together. Collars, hems, and sleeves are all built on the number you cast on, so a miscount at the very start can ripple through the whole project. That is why seasoned knitters count twice and knit once.
Cast on is not the same as the first row
New knitters sometimes wonder whether the cast on counts as a row. In most patterns it does not; it simply creates the stitches you will work into. Your first row of actual knitting comes after, when you work into each loop with the other needle. Keeping that distinction in mind will save you confusion later when a pattern says to work a certain number of rows from the cast on edge.
Gear You Need Before the First Stitch
You do not need much to learn to cast on, but the right tools make the whole experience far gentler. A slippery needle with a pointy tip and a splitty, fuzzy yarn is a recipe for frustration. A smooth, medium-weight yarn and a comfortable needle let you see what your hands are doing.
Knitting needles
For practice, choose a pair of straight needles or the tips of a circular needle in a medium size. Wood and bamboo needles grip the yarn gently, which stops stitches from sliding off while you learn. Metal needles are slicker and faster but easier to lose control of. If you are unsure which pair to pick, our roundup of the best knitting needles for beginners compares comfortable, forgiving options, and our explainer on what size knitting needles to use as a beginner walks through matching needles to yarn.
Yarn that is kind to beginners
Pick a smooth, light-colored yarn in a medium weight, often labeled worsted. Light colors let you see each loop clearly, and smooth strands are less likely to split when you push a needle through. Avoid fuzzy mohair, dark black yarn, and anything with lots of texture until your confidence grows. If you want help choosing, see our guide to the best yarn for beginner knitting.
Helpful extras
- A tape measure or ruler, for judging tail length and gauge.
- A small pair of scissors for trimming yarn ends.
- A tapestry needle for weaving in tails later.
- Stitch markers, which make counting a long cast on much easier.
- A pencil and paper, or a row counter, to keep track of stitch counts.
If you would rather skip the shopping and buy everything together, a boxed starter set is a perfectly sensible way to begin. Our comparison of the best knitting kits for beginners shows which ones include useful tools and which are mostly packaging.
Practice tip: Use a spare ball of yarn for practicing your cast on. You will cast on and rip out many times while your hands learn the rhythm, and a throwaway yarn means you will never feel precious about the result.
Make a Slip Knot First: The Starting Point for Every Method
Almost every cast on begins with a slip knot. It is a simple adjustable loop that sits on your needle and counts as your first stitch. Mastering it takes under a minute, and once you can do it without thinking, the rest of the methods in this guide feel much easier.
The slip knot has a clever feature: pull on one strand and the loop tightens, pull on the other and it loosens. That adjustability is exactly why it makes such a friendly starting stitch.
Step 1: Make a loop with the yarn
Leave a tail of about six inches (15 cm) for now, and lay the yarn across your palm. Wrap the working yarn, the strand running to the ball, over the tail so the two strands cross and form a loop. The crossing point is the place you will pinch in the next step.
Step 2: Pull a bight of working yarn through the loop
Pinch the crossing point between your thumb and finger. With your other hand, reach through the loop and grab the working yarn a little way from the crossing. Pull a small folded section of that strand, called a bight, up through the loop. You should now see a new loop appear, while the original loop is still open behind it.
Step 3: Slide it onto the needle and tighten
Place the new loop over your needle. Gently pull the tail with one hand and the working yarn with the other until the loop hugs the needle without strangling it. You want it snug enough to stay put but loose enough to slide freely along the needle. This is your first stitch, and you are ready to cast on the rest.
Check your knot: The strand running to the ball should go straight into the loop, so pulling it tightens the knot. If pulling the working yarn does nothing, your loop was formed the wrong way. Undo it and start again; it is a very common slip-up the first few times.
The Long-Tail Cast On, Step by Step
If you only learn one method, make it this one. The long-tail cast on is the most widely used technique in knitting, and for good reason. It produces a neat, slightly stretchy edge that looks tidy and wears well. It uses both a tail and the working yarn, and it creates the stitches with a smooth, rhythmic movement that becomes second nature after a few rows of practice.
The one challenge is estimating how long the tail should be. Too short and you run out of yarn halfway across; too long and you waste a lot of it. The steps below show you how to avoid that guesswork.
Step 1: Measure the tail and place the slip knot
A reliable rule of thumb is to allow about one inch (2.5 cm) of tail for every stitch you plan to cast on, then add a few extra inches to be safe. That works well for a medium-weight yarn. Finer yarn needs a little less per stitch, and bulky yarn needs more. Another shortcut is to wrap the yarn around your needle once for every stitch and add a generous tail on top.
Once you have measured, make a slip knot at that point, just like in the previous section, and slide it onto your needle. The yarn leading to the ball is the working yarn. The yarn trailing off the knot is the tail.
Step 2: Hold the needle and set up your fingers
Hold the needle in your right hand. Let the two strands hang down below it, with the tail on the left and the working yarn on the right. Slide your left thumb and index finger between the two strands, then spread them apart so the tail wraps over your thumb and the working yarn wraps over your index finger. Close the remaining fingers over both strands to hold them steady in your palm.
This position is often called the slingshot, because the yarn stretches between your thumb and finger like a slingshot band. It feels awkward at first. Keep at it, because the awkwardness fades quickly.
Step 3: Open the thumb loop
Look at your thumb. The tail strand should wrap around the front of it, making a small loop. If you spread your thumb and index finger slightly apart, that loop will open and become easy to see. This loop is where you will put the needle in the next step.
Step 4: Insert the needle up through the thumb loop
Bring the needle tip toward your thumb and pass it up through the loop from underneath. The needle ends up inside the thumb loop, resting against the strand that crosses the front of your thumb. Keep your wrist relaxed. The motion is small, and forcing it only makes it clumsier.
Step 5: Catch the working yarn
Now dip the needle tip over the strand of working yarn that runs from your index finger, and hook it. The needle should scoop up the yarn from the side nearest your thumb, pulling it toward the loop on your thumb. It helps to think of it as a tiny fishing motion: dip, hook, and draw back.
Step 6: Pull the loop through, drop the thumb loop, and tighten
Draw the needle back through the thumb loop, bringing the hooked working yarn with it. You now have a new loop on your needle. Slip your thumb out of the old loop, then put it back into the slingshot position, and gently pull the tail to tighten the new stitch against the needle.
That is one stitch done. Repeat steps three through six until you have the number of stitches you need, counting the slip knot as the first.
Making the long-tail smoother with practice
Most people find the first ten stitches clumsy and the next ten surprisingly easy. The trick is to stop watching your hands closely and let the rhythm build. Say the movements to yourself if it helps: thumb loop, needle up, catch the yarn, pull through, drop, tighten. After a few rows of repeating that little sequence, your fingers will take over and you can chat or watch something while you work.
Also pay attention to how the stitches sit on the needle. They should be evenly spaced, with a small gap between each one rather than crammed together. If your stitches pile up, push them back along the needle after every few casts on so they do not get squashed.
A note for left-handed knitters
The instructions here describe holding the needle in the right hand, which is how most knitting is taught. If you are left-handed, you can follow the same movements in mirror image, or simply learn the standard way, since knitting uses both hands in a similar manner. Many left-handed knitters find that they get along well with the usual method. Either choice is fine, and the best one is the one that feels comfortable to you.
What the long-tail does well
- Neat, balanced edge that looks professional
- Good stretch for most projects
- Fast once you find the rhythm
- Works for nearly any yarn weight
Where it can trip you up
- Estimating the tail length takes practice
- Running out of tail means starting over
- Uses a two-strand grip that feels odd at first
- Cannot add stitches mid-row
Rescue tip: If you run out of tail before you finish, do not panic. You can leave the stitches on the needle, undo the cast on, and begin again with a longer tail. After a few tries you will develop a feel for the right amount, and measuring against your needle will start to feel natural.
The Knitted Cast On, Step by Step
The knitted cast on is a favorite for beginners because it needs only one strand of yarn and one idea: you create each new stitch by knitting into the one before it. There is no tail to measure and no slingshot position to learn. If the long-tail method feels like patting your head and rubbing your stomach at the same time, this is a friendlier place to start.
The edge it produces is a little thicker and firmer than the long-tail, which makes it a good choice for projects that need structure, such as the edge of a blanket or the start of a scarf.
Step 1: Insert the right needle into the stitch
Begin with your slip knot on the left needle. Hold that needle in your left hand and the empty needle in your right. Insert the right needle tip into the stitch from front to back, in the same way you would to make a knit stitch, so the right needle sits behind the left needle.
Step 2: Wrap the yarn around the right needle
Bring the working yarn around the right needle tip in a counterclockwise direction, passing it between the two needles. The yarn should lie across the tip of the right needle, ready to be drawn through. Keep the wrap loose enough that the needle can slide through without catching.
Step 3: Pull the new loop through
Slide the right needle tip toward you, pulling the wrapped yarn through the stitch to form a new loop on the right needle. Notice that the old stitch is still sitting on the left needle. You have not dropped it yet. That happens next.
Step 4: Place the new loop on the left needle
Insert the left needle tip into the front of the new loop from right to left, then slip the right needle out. The loop should sit on the left needle with its right leg in front. Give the working yarn a gentle tug to snug the new stitch, though not so hard that it chokes the needle.
You now have two stitches on the left needle. Insert the right needle into the newest stitch and repeat steps one through four until you have enough stitches.
Why beginners like it
- No tail estimation needed
- Easy to see and understand
- Firm edge that holds shape
- Can add stitches in the middle of a row
What to watch for
- Edge is a little bulky
- Less stretchy than the long-tail
- Stitches can become too tight if you pull hard
- Slower for very large stitch counts
The Cable Cast On, Step by Step
The cable cast on is a close cousin of the knitted cast on, but it makes a sturdier, rope-like edge. The only difference is where you place the needle. Instead of going into the stitch itself, you go between the first two stitches. That small change produces a firmer, more stable edge that is especially useful for button bands, the start of a sweater hem, or any place that needs strength.
To begin, cast on two stitches using the knitted method from the previous section. After that you switch to the cable technique for the rest.
Step 1: Insert the right needle between the first two stitches
With two stitches on the left needle, slide the right needle tip into the gap between them, not into a stitch. Push it from front to back, as if you were about to knit two stitches together, but stop once the tip is in the gap.
Step 2: Wrap the yarn and pull a loop through the gap
Wrap the working yarn around the right needle tip counterclockwise, as you would for a knit stitch. Draw the needle back through the gap, pulling the yarn with it so a loop forms on the right needle.
Step 3: Put the new stitch on the left needle and repeat
Slip the new loop onto the left needle, placing it in front of the other stitches. You now have three stitches. For the next one, insert the needle between the first two stitches again and repeat the process. Work this way until you reach your desired stitch count.
Strengths
- Very firm, stable edge
- Needs no tail length guessing
- Great for buttonholes and borders
- Easy to cast on extra stitches mid-row
Drawbacks
- Has very little stretch
- Not suited to cuffs and hat brims
- Can feel fiddly when stitches are tight
Keep it loose: Because the cable cast on is naturally firm, it is easy to make it too tight. Hold the working yarn with a relaxed tension and pull each new loop up just far enough to sit on the needle without squeezing.
The Backward Loop Cast On, Step by Step
The backward loop, sometimes called the e-wrap cast on, is the quickest technique in this guide. It uses only your working yarn and one hand, so it is perfect when you need to add stitches in the middle of a project, such as when making a buttonhole or a thumb opening. It is also a handy way to cast on a few stitches at the end of a row.
The trade-off is that the edge is loose and a bit uneven, and the stitches are less secure than other methods. That makes it a poor choice for the bottom of a sweater, but a great one for quick additions.
Step 1: Twist the working yarn into a backward loop
Hold the needle in your right hand and the working yarn in your left. Make a loop by crossing the yarn over itself so the working strand passes over the loop, forming the shape of a backward letter e. The loop should twist away from you, with the yarn crossing in the middle.
Step 2: Slip the loop onto the needle
Place the loop onto your right needle and pull the working yarn gently to snug it up. The loop should sit on top of the needle with its crossing strand underneath. You have now made one stitch.
Step 3: Repeat for each stitch and keep the loops relaxed
Make another loop and slip it onto the needle in the same way. Keep each loop slightly loose, because tight loops are very hard to knit into on the next row. Continue until you have cast on the required number of stitches.
Where it shines
- Fastest method to learn and use
- Needs only one hand and one strand
- Ideal for adding stitches mid-row
- Handy for buttonholes and openings
Where it falls short
- Loose, uneven edge
- Stitches can twist or unravel easily
- Not recommended for project beginnings
Which Cast On Method Should You Choose?
With four methods under your belt, the natural question is which one to reach for. The honest answer is that it depends on what you are making, how stretchy the edge needs to be, and how comfortable you feel. Here is a side-by-side look to make the decision easier.
| Method | Stretch | Edge look | Tail needed? | Best for |
|---|---|---|---|---|
| Long-tail | Medium to good | Neat, braided | Yes | Scarves, sweaters, general use |
| Knitted | Low to medium | Small knots, slightly bulky | No | Beginners, blankets, mid-row additions |
| Cable | Low | Firm, rope-like | No | Borders, button bands, structured edges |
| Backward loop | Medium (but loose) | Loose, uneven | No | Buttonholes, quick mid-row stitches |
A simple way to decide
If you are making a scarf, a blanket, or a flat piece that does not need to stretch much, the knitted cast on is a gentle and dependable choice. If you want a polished edge that looks the same on every project, learn the long-tail. If you need a firm border for a cardigan front, the cable cast on will serve you well. And whenever you need to add a few stitches in the middle of your work, the backward loop will get you there fastest.
- First project, no stress: knitted cast on.
- All-purpose edge: long-tail cast on.
- Firm, supportive edge: cable cast on.
- Quick additions mid-project: backward loop cast on.
Many experienced knitters rotate through all of them, picking the right one for each job. You do not need to commit to one forever.
Stretchy Cast Ons for Cuffs, Hats, and Socks
Some projects need an edge that can expand and then spring back, such as the brim of a hat, the cuff of a sleeve, or the top of a sock. A cast on that is too firm will dig into the skin, and a hat that cannot stretch over a head is a hat nobody wears. This is where stretchy variations come in handy.
Use a larger needle for the cast on row
The simplest trick in the book is to cast on with a needle one or two sizes larger than your project needle, then switch to the smaller needle for the first row. The larger needle builds extra room into every stitch, which makes the edge more elastic without changing your technique at all. You can also hold two needles together as you cast on and slide one out before knitting the first row.
Long-tail variations with extra give
Two popular variations of the long-tail method are known as the Old Norwegian cast on and the German twisted cast on. Both follow the same general movement as the standard long-tail but add an extra twist or loop around the thumb strand. That small addition builds additional yarn into every stitch, which gives the edge more stretch. They are excellent choices for ribbed cuffs, socks, and hat brims. Many knitters learn them after they are comfortable with the plain long-tail, since the only change is that extra twist.
Tubular and other specialty options
A tubular cast on creates a soft, rounded, professional-looking edge on ribbing, which is why you see it on high-quality sweaters and socks. It takes more effort than the other methods and is usually worth learning once you have a few projects under your belt. If you ever feel adventurous, it is a lovely skill to add.
Quick stretch test: After casting on, gently stretch the edge between your hands. If it resists strongly or feels tight, it will probably feel tight when worn. If it springs back evenly, you are in good shape.
For most beginner projects you will not need these, but knowing they exist saves you from a frustrating hat later on. Start with the basics, then come back to these when your project calls for them.
Getting the Tension and Needle Size Right
Tension simply means how tightly or loosely you hold the yarn as you knit. It affects every stitch, and it matters most at the cast on, where mistakes are hardest to hide. Learning to control tension is one of the biggest steps toward smooth, even knitting.
Aim for snug, not strangled
Each stitch should sit comfortably on the needle and slide along it with a gentle nudge. If you have to wrestle the stitches to move them, they are too tight. If they flop about and fall off, they are too loose. The sweet spot lets you push the needle tip into each loop easily on the first row.
Choosing a needle size
Most yarn labels suggest a needle size range. As a starting point, use the middle of that range, and go up a size if you tend to knit tightly or down a size if your stitches look sloppy. Beginners usually do best with a medium-weight yarn on a medium-sized needle, because both are easy to see and handle. If you want more help matching the two, our guide on what size knitting needles for beginners goes into more detail.
Habits that improve tension
- Relax your shoulders and hands. Tight grip means tight stitches.
- Pull each stitch snug against the needle, then let go before moving on.
- Keep your cast on stitches the same size by using the same pull each time.
- Take regular breaks. Tired hands tighten up without you noticing.
- Cast on slightly looser than you think you need to; you can always tighten later.
It can help to wrap the working yarn once around your little finger or weave it through your fingers, which adds gentle friction and keeps the flow steady. Try a few ways of holding the yarn and keep the one that feels natural.
How needle material changes the feel
The material of your needles affects how the yarn behaves during the cast on. Smooth metal needles let stitches glide quickly, which suits fast knitters but can make beginners feel as if the stitches are escaping. Bamboo and wood have a gentle grip that keeps loops in place and gives you more control. Plastic sits in between. If your cast on keeps sliding off the needle, a wooden pair may calm things down considerably.
Rule of thumb: If the first row feels hard to knit into, your cast on is probably too tight. Pull the stitches along the needle to spread them out, or try again with a larger needle for the cast on only.
Common Cast On Mistakes and How to Fix Them
Every knitter makes these mistakes at some point. They are not signs of failure; they are signs of learning. Here are the ones that come up most often and how to fix each without despair.
| Problem | Likely cause | Quick fix |
|---|---|---|
| Edge is too tight | Pulling stitches hard against the needle | Cast on over a larger needle or two needles held together |
| Edge is loose and floppy | Leaving big gaps between stitches | Keep stitches close together and tighten each one gently |
| Ran out of tail | Estimated the tail too short | Undo and start again with a longer tail, about an inch per stitch plus extra |
| Stitch count is wrong | Miscounting or skipping a loop | Count in groups of ten using stitch markers |
| Stitches look twisted | Loops sit on the needle the wrong way | Check that each loop leans the same way, and re-seat any that look different |
| Slip knot slides off | Knot is too loose or made incorrectly | Tighten the knot, or remake it so the working yarn runs through the loop |
The count that never matches
One of the most irritating beginner problems is casting on what you believe is thirty stitches and ending up with twenty-nine or thirty-one. It happens to nearly everyone. The slip knot counts as the first stitch in most methods, so people often add an extra one by mistake. Count again before you start the first row, and fix errors early. It is much easier to undo a cast on than to knit a whole row on the wrong number of stitches.
When the cast on row will not budge
If the stitches refuse to slide along the needle, they are almost certainly too tight. Rather than forcing them, gently stretch the row by pulling the stitches apart, or slip the stitches onto a larger needle for the first row. For future attempts, loosen your grip and keep the working yarn a little slacker as you cast on.
Twisted stitches on the first row
A twisted stitch happens when the loop sits the wrong way around the needle. It usually shows up on the first row as a stitch that is hard to knit into or that looks crossed. Learn to recognize the correct orientation, where the front leg of the loop is on the front of the needle, and check your row before you begin. Most beginners catch it quickly once they know what to look for.
Casting on for knitting in the round
If you are making a hat, a cowl, or socks, you will cast on and then join the stitches into a circle. The one rule to remember is that the cast on edge must not twist around the needle. Lay the stitches flat with the cast on edge facing the same direction all the way around before you join. A twisted cast on becomes a permanent twist in the finished piece, and it cannot be fixed without starting over. Take a moment to check the row before you begin, and place a marker at the start of the round so you always know where you are.
Do not be afraid to start over
Restarting a cast on takes thirty seconds, while knitting several rows on a flawed edge can cost you an evening. Experienced knitters redo their cast on without a second thought. Treat each attempt as practice, because that is exactly what it is.
Counting Your Stitches, Practice Projects, and Next Steps
Once you can cast on without stopping to think, a few habits will keep your work tidy and your confidence growing. Counting is the first. After casting on, go through the row once and tally your stitches. Place a stitch marker every ten stitches so recounting is quick, and write the number down so you never have to guess later.
Practice that actually works
Hands learn through repetition, so try this simple routine. Cast on twenty stitches with each method in this guide. Knit a few rows on each one, then compare the edges side by side. You will quickly learn which feels best in your hands and which creates the edge you like. It takes less than an hour and teaches more than any amount of reading.
- Cast on twenty stitches with the long-tail, then rip it out and try again until it feels smooth.
- Repeat with the knitted cast on and compare how the edges look.
- Try the cable cast on and notice how firm it is.
- Use the backward loop to add five stitches to the end of a practice swatch.
Your first real project
A simple scarf is the classic beginner project because it uses only a straight row of knit stitches and lets you practice cast on, knitting, and finishing without any shaping. Our walkthrough on how to start knitting a scarf takes you from yarn to finished piece step by step. A dishcloth or small square swatch works well too, since a small project is quick to finish and forgiving of mistakes.
What comes after casting on
Learning to cast on is only the beginning. After a few rows of knitting, you will need to finish your work properly so it does not unravel. When that moment comes, our guide to how to cast off knitting shows you how to bind off neatly and keep the edge stretchy. Between the two skills, you will be able to make almost any flat project.
Remember that knitting is a skill built slowly. Your first cast on may be wobbly. Your tenth will be better, and your hundredth will feel like breathing. Be patient with yourself, enjoy the quiet rhythm, and keep going.
Frequently Asked Questions About Casting On
What is the easiest way to cast on knitting for a beginner?
The knitted cast on is usually the easiest place to start. It uses a single strand of yarn, needs no tail measurement, and follows the same motion as a knit stitch, so it teaches you a skill you will use again right away.
How much yarn tail do I need for a long-tail cast on?
As a general guide, allow about one inch (2.5 cm) of tail for every stitch, then add a few extra inches. Thicker yarn needs a bit more per stitch, and thinner yarn needs a bit less. If you are unsure, a longer tail is always safer than a shorter one.
Does the slip knot count as a stitch?
In most methods, yes. The slip knot is your first stitch, so if a pattern says to cast on thirty stitches, you make the slip knot and then twenty-nine more. Always check your pattern if it says otherwise.
Why is my cast on so tight?
Most often it is because the stitches are pulled hard against the needle. Try relaxing your grip, spacing the stitches slightly, or casting on over a larger needle or two needles held together, then switching to your project needle for the first row.
What is the most stretchy cast on method?
Variations of the long-tail, such as the Old Norwegian and German twisted cast ons, are known for good stretch. They are popular for cuffs, hat brims, and socks. A tubular cast on is another elastic option for ribbing.
Can I cast on stitches in the middle of my knitting?
Yes. The backward loop, knitted, and cable cast ons all work in the middle of a row or at the end of one. They are commonly used for buttonholes, thumb openings, and shaping.
Which cast on is best for a scarf?
The long-tail gives a polished edge, while the knitted cast on is a gentle, tail-free option. Either works well for scarves, and the choice mostly comes down to which feels more comfortable in your hands.
How do I keep my cast on stitches even?
Use the same tension for every stitch, keep them evenly spaced, and snug each one against the needle before making the next. Practicing with a smooth, light-colored yarn helps you spot uneven stitches early.
What size needle should I use for casting on?
Use the needle size your pattern recommends, or go up one or two sizes for a looser, stretchier edge. Switch to the regular needle for the first row of knitting.
What should I do if I run out of tail halfway through?
Unfortunately the easiest fix is to undo the cast on and start again with a longer tail. Measuring against your needle by wrapping the yarn once per stitch, and then adding extra, helps prevent it next time.
Is the long-tail cast on better than the knitted cast on?
Neither is better in every case. The long-tail gives a neater, more elastic edge and is faster once learned, while the knitted cast on is easier to start with and does not need a tail. Many knitters use both depending on the project.
How many stitches should I cast on for a practice swatch?
Between twenty and thirty stitches is plenty. It is wide enough to practice the method and see how the edge behaves, but small enough to finish quickly and rip out without much fuss.
Conclusion: Cast On with Confidence
Casting on may feel like a small hurdle, but it is the doorway to everything else in knitting. With a slip knot and a few simple movements, you can start nearly any project, and once your hands learn the rhythm you will wonder why it ever felt hard.
Start with the method that feels friendliest. Many beginners begin with the knitted cast on, graduate to the long-tail for its tidy edge, and keep the cable and backward loop in their back pocket for special situations. Keep your tension relaxed, count your stitches, and do not be afraid to rip it out and try again. Every knitter you admire has done exactly that more times than they can count.
When you are ready to gather your supplies and make something, a good set of needles and a soft, smooth yarn are all you need. Pick up your needles, make that first loop, and enjoy the first stitch of many.