
How to Start Knitting: A Complete Beginner’s Guide From First Loop to Finished Piece
Everything you need to pick up two needles and a ball of yarn and actually enjoy the process, with step-by-step diagrams for every core skill.
There is a particular kind of calm that arrives about twenty minutes into your first real knitting session. Your shoulders drop, your hands find a rhythm, and the fabric grows one tiny loop at a time. If you have been wondering how to start knitting, the good news is that the craft is built from just two basic movements, and once you can do both, you can make almost anything.
This guide walks you through the whole journey in plain language. We begin with what knitting is and what you need to buy, then move step by step through the slip knot, casting on, the knit stitch, the purl stitch, working rows, and finishing off. Every core step includes its own illustration so you can see what your hands should be doing. Along the way you will find tables, quick fixes for common mistakes, and ideas for what to make first.
1. What Knitting Really Is (and Why It’s Worth Learning)
Knitting is the craft of building fabric from a single continuous strand of yarn by pulling loops through other loops. Each loop is called a stitch. You hold one needle in each hand, and you move stitches from one needle to the other, creating a new row each time. Unlike weaving, nothing is crossed over and under at right angles; the fabric is a chain of interlocking loops, which is exactly why knitted things stretch and hug the body so comfortably.
Many beginners worry that knitting looks impossibly complicated because they have seen elaborate cabled sweaters or lacy shawls. In reality, even those pieces are made from the same two stitches you are about to learn: the knit stitch and the purl stitch. Everything else, from ribbing to cables to colorwork, is simply a clever arrangement of those two building blocks.
Why people fall in love with it
The appeal goes well beyond the finished scarf. Knitting gives restless hands something purposeful to do. Many people use it to wind down in the evening, to stay off their phones, or to make the long commute pass more pleasantly. It is also portable, quiet, inexpensive to begin, and endlessly forgiving, since a mistake can almost always be unraveled and redone without losing a thing but a little time.
There is a practical reward too. A hand-knitted hat or pair of socks carries a certain sentimental weight that store-bought items rarely do, which is why handmade gifts are so treasured.
Knitting or crochet first?
Some newcomers wonder whether they should start with a hook instead of needles. Knitting uses two needles and keeps many stitches active at once, while crochet uses a single hook and works one stitch at a time. Each has its charms, and if you are torn, our comparison of crochet versus knitting and which is easier can help you decide. If you are here, though, you have probably already felt the pull of those two needles, so let’s get going.
Ready to gather your gear? Browse beginner-friendly knitting starter sets all in one place.
Shop Beginner Knitting Kits2. Supplies You Actually Need
Walk into any craft store and the wall of gadgets can feel overwhelming. The truth is that you can begin with a remarkably short list. Buying less at the start also keeps the hobby from feeling like a financial commitment before you know whether you love it.
The essential list
- A ball or skein of yarn. Smooth, light-colored, medium-weight yarn is the easiest to see and handle.
- A pair of knitting needles. Matching straight needles in a mid-range size are ideal for learning.
- Scissors. Any small pair will do for snipping yarn tails.
- A tapestry needle. This large blunt needle with a big eye is used to weave in loose ends at the finish.
- A tape measure or ruler. Useful for checking the width and length of your work.
Nice extras that are worth adding soon
- Stitch markers to flag a particular spot in a row.
- A row counter so you never lose your place when life interrupts.
- A project bag that keeps yarn clean and needles from wandering.
- A crochet hook in a small size, which is a surprisingly handy tool for rescuing dropped stitches.
Kit or individual items?
A starter kit bundles most of the essentials, which is convenient if you do not want to make a dozen decisions at once. Buying separately lets you choose the yarn color and fiber you actually like. Neither approach is wrong, and the comparison below shows how they differ.
| Option | Best for | Main benefit | Main drawback |
|---|---|---|---|
| All-in-one starter kit | Complete beginners and gift buyers | Everything arrives together, often with instructions | Yarn and needles may be basic quality |
| Individual items | People who know what they like | Full control over color, fiber and needle material | More choices and more shopping |
| Borrowed or secondhand gear | Budget-conscious learners | Almost free to try the craft | Sizes and condition can be hit or miss |
If a kit sounds appealing, take a look at our roundup of the best knitting kits for beginners to see which ones are genuinely worth the money.
Traveling with your tools
Knitting is a wonderful travel companion, and plenty of people take it on trains, buses and flights. If you plan to fly, rules about needles vary, so it is wise to read up first. We cover this in detail in our guide on bringing knitting needles on a plane if you want to avoid surprises at security.
Build your toolkit. Pick up a tapestry needle set, stitch markers and a project bag.
Shop Knitting Accessories3. Choosing Your First Yarn
Yarn is the single most influential choice you will make as a beginner. The wrong yarn can make learning frustrating, while the right one feels almost cooperative. Think of it as picking a good practice partner rather than a final-product material.
Weight: aim for medium
Yarn weight describes how thick the strand is. For learning, a worsted or medium weight is the sweet spot. It is thick enough that you can see each stitch clearly, yet fine enough that your projects do not take forever. Super bulky yarn can feel clumsy in the hands, and fingering weight yarn is so thin that mistakes hide easily.
Fiber: keep it simple
Wool is springy and forgiving, but some people find it scratchy. Cotton is soft and cool, though it has little stretch, which makes stitches feel stiffer. Acrylic is affordable, easy to wash and available in countless colors, which makes it a popular first choice. A wool blend with a touch of nylon or acrylic often gives the best of everything.
Good beginner yarn
- Smooth, tightly plied strands
- Light or medium colors
- Medium (worsted) thickness
- Machine washable
Frustrating beginner yarn
- Fuzzy, hairy or mohair-like textures
- Very dark colors that hide stitches
- Novelty yarns with ribbons or loops
- Splitty, loosely twisted strands
How much do you need?
For a practice swatch, a single small ball is plenty. For a simple scarf, plan on about two to three skeins of medium weight yarn, depending on length. When in doubt, buy one more than you think you need, since dye lots can vary and matching colors later is not always possible.
Not sure where to begin? Our guide to the best yarn for beginner knitting breaks down specific picks by fiber, budget and feel.
Find your perfect starter yarn. Soft, smooth and easy on the eyes.
Shop Beginner Yarn4. Picking the Right Needles
Needles come in different lengths, materials and thicknesses, and the right combination makes a visible difference to how smoothly your stitches glide. Do not let the variety intimidate you. You only need to understand a few basic ideas.
Needle size
Needle thickness is measured in millimeters, and a larger number means a thicker needle. As a rule, the yarn label recommends a needle size. For medium weight yarn, that is typically somewhere in the 5 to 6.5 mm range. Beginners often do best slightly on the larger side because looser stitches are easier to work into. Our dedicated article on what size knitting needles are best for beginners goes into more detail.
| Yarn weight | Typical needle size | Good for beginners? |
|---|---|---|
| Super bulky | 9 mm and larger | Fast but bulky to handle |
| Bulky | 6.5 to 9 mm | Great for quick scarves |
| Medium (worsted) | 4.5 to 5.5 mm | Ideal for learning |
| Light (DK) | 3.75 to 4.5 mm | Fine once you have some practice |
| Fingering | 2.25 to 3.5 mm | Better saved for later |
Needle material
- Bamboo and wood: warm, lightweight, and slightly grippy, so stitches do not slip off easily. This is the top pick for most beginners.
- Metal: smooth and fast, which suits confident knitters but can let stitches slide off when you are still learning.
- Plastic: inexpensive and light, though sometimes a little flexible.
Straight or circular?
Straight needles have a point on one end and a stopper on the other. Circular needles have two points joined by a flexible cable. Circulars can be used flat, just like straights, and they distribute the weight of the project in your lap. Straights, however, feel the most intuitive on day one.
Straight needles
- Easy to understand at a glance
- Great for small flat projects
- Often sold in inexpensive pairs
Circular needles
- Handle larger projects with less strain
- Work flat or in the round
- Cable can feel fiddly at first
If you want a closer look at the options, our list of the best knitting needles for beginners compares popular sets side by side.
Choose needles that feel good. Bamboo straight needles are a lovely place to start.
Shop Knitting Needles5. Make a Slip Knot and Learn to Hold Your Needles
Every piece of knitting begins with a slip knot. It is an adjustable loop that sits on your needle and anchors the very first stitch. Think of it as the doorway into the whole project. It takes under a minute to make, and after a few tries your fingers will do it without any thought.
How to make the slip knot
- Unwind about 15 cm (6 inches) of yarn from the ball to create a tail. For a real project, you will want a much longer tail, but this is fine for practice.
- Make a loose circle by laying the working yarn over the tail, so the strands cross like the letter “e”.
- Reach through the circle with your fingers, grab the working yarn (the strand attached to the ball), and pull a loop of it up through the circle.
- Place the new loop on your needle and gently pull both strand ends to snug it up. The loop should slide along the needle but not be loose.
Holding the needles and yarn
There is no single correct way to hold your needles. The two most common styles are English, where the yarn is held in your right hand, and Continental, where the yarn is held in your left. This guide demonstrates a relaxed, beginner-friendly English hold, but try both over time. Many knitters settle on whichever style feels most natural.
Hold the needle with the slip knot in your right hand like a pencil or like a fork, whichever feels comfortable. Your left hand will support the other needle once you begin to cast on. Wrap the working yarn around your fingers loosely so it flows freely but still has gentle tension. If the yarn feels like it is strangling your fingers, loosen it. If it is slack and falling off, tighten it a bit.
Want a gentle practice yarn? A smooth, light-colored skein makes stitches easy to see.
Shop Practice Yarn6. Cast On Your First Stitches
Casting on is how you create the very first row of stitches on your needle. Without it, you would have nothing to knit into. There are many cast-on methods, each with different looks and stretch, but beginners almost always start with the long-tail or the knitted cast on. For this guide, we will use the simple knitted cast on, which uses the same motion as the knit stitch you are about to learn, so you get a bonus practice run.
The knitted cast on
- Start with your slip knot on the left needle.
- Insert the right needle into the loop from front to back, so it sits behind the left needle.
- Wrap the working yarn counterclockwise around the right needle tip.
- Use the right needle to pull a new loop through the slip knot, bringing it toward you.
- Slide that new loop onto the left needle by twisting it slightly, then tug gently so it is snug but not strangled.
- Repeat, inserting your right needle into the newest stitch each time, until you have as many stitches as your project calls for.
How many stitches should you cast on?
For your first practice swatch, 20 stitches is a manageable number. It is wide enough to feel like real knitting and narrow enough that a row takes only a minute or two. If you plan to make a scarf later, you can always cast on a different number depending on the width you like.
Keep the tension even
New knitters often cast on too tightly, which makes the first row of knitting very hard to work into. A handy trick is to hold two needles together when you cast on, then slip one out before you begin knitting. That creates just enough slack. For deeper detail on other cast-on methods, including the long-tail, see our full tutorial on how to cast on knitting.
Practice makes smooth stitches. A starter set with needles and yarn lets you cast on right away.
Shop Starter Sets7. Learn the Knit Stitch
The knit stitch is the heart of the craft. If you can do this one movement, you can already make a scarf, a dishcloth or a blanket. Take it slowly at first. Each stitch has four tiny actions, and once those four are in your muscle memory, you will find your speed naturally.
The four movements
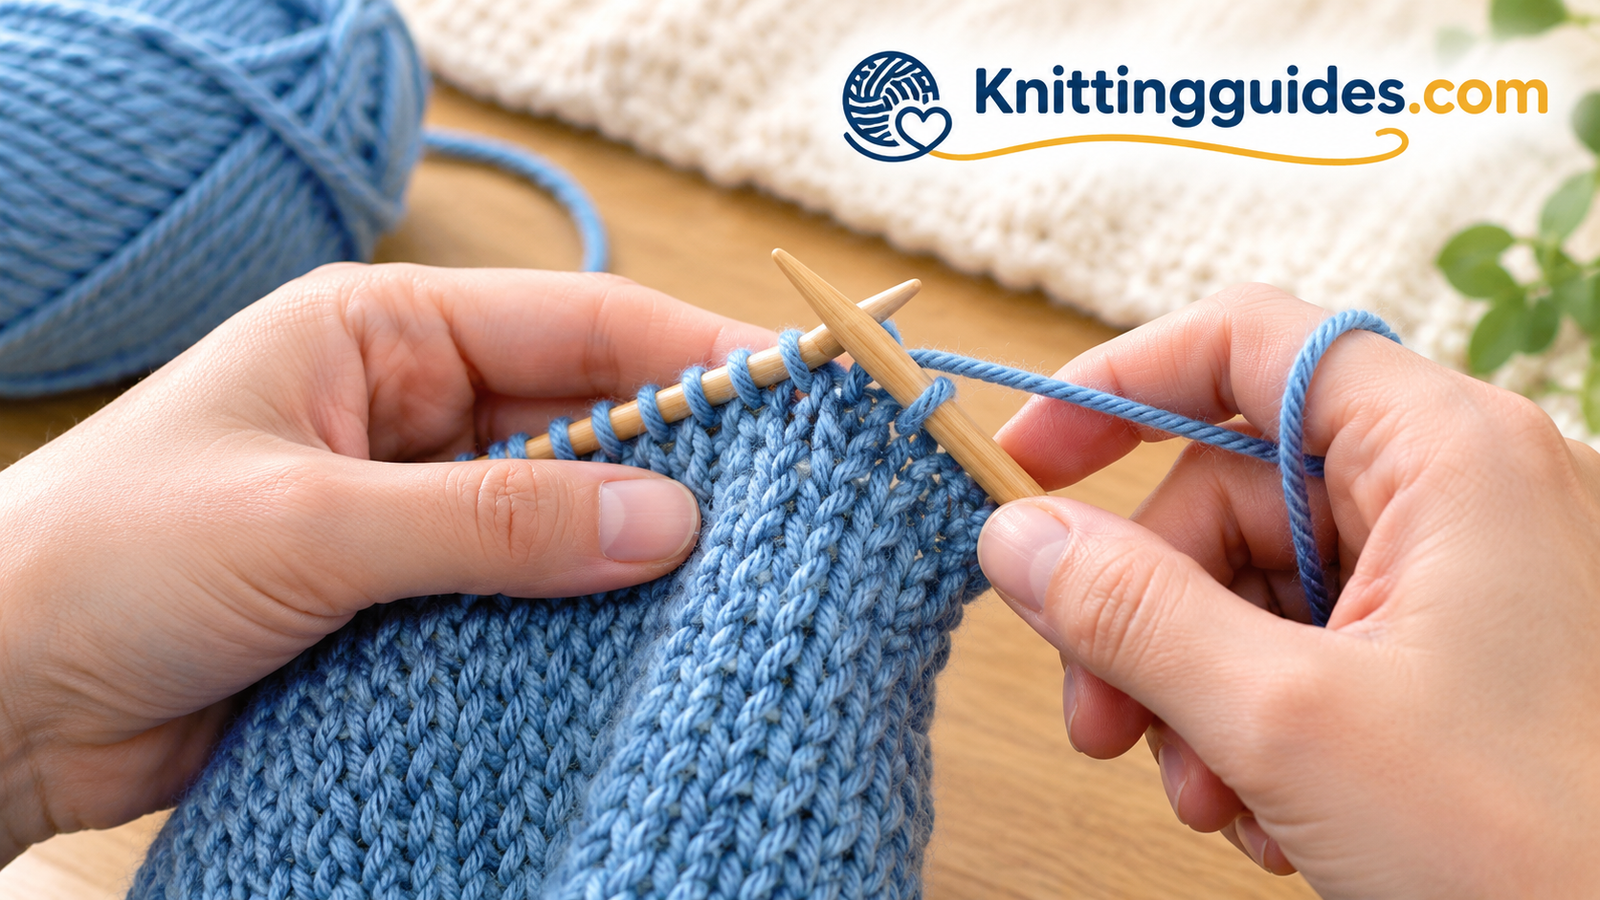
- Insert. Hold the needle with all your cast-on stitches in your left hand. Slide the right needle into the first stitch, going from left to right and passing in front of the left needle’s tip, so that the right needle sits behind and crosses the left.
- Wrap. Bring the working yarn around the back of the right needle, then up and over the tip in a counterclockwise motion.
- Pull through. Use the right needle tip to draw the wrapped yarn through the old stitch, forming a new loop on the right needle.
- Slide off. Let the old stitch slip off the left needle. The new stitch now sits on the right.
Practice your first row
Repeat those four movements across every stitch on the left needle until the left needle is empty. Then switch hands: the needle full of new stitches goes into your left hand and the empty needle goes into your right. Congratulations, you have knitted a row. Do not worry if your stitches look uneven or a bit sloppy. Evenness comes with repetition, not with trying harder.
Watch for these early hiccups
- Stitches that feel impossibly tight: Loosen your grip on the working yarn and make sure your cast-on was not too snug.
- Gaining stitches: This often happens when the yarn wraps around the needle twice, or when you accidentally knit into the same stitch twice.
- Losing stitches: A loop slipped off a needle, or a stitch was skipped. Count after every few rows.
Need a handy helper? A row counter keeps track while you focus on your hands.
Shop Row Counters8. Learn the Purl Stitch
The purl stitch is the knit stitch’s mirror image. Where a knit stitch shows a neat “V” on the front of the fabric, a purl stitch shows a small bump. Alternate the two in different patterns, and you get ribbing, stockinette, seed stitch and nearly every other texture you will ever want to make. Learning the purl stitch is what turns you from someone who can make a scarf into someone who can knit nearly anything.
The four movements, in reverse
- Bring the yarn to the front. Before you start, move the working yarn forward between the two needles so it sits toward you.
- Insert. Slide the right needle into the front of the first stitch from right to left, so the right needle sits in front of the left.
- Wrap. Take the yarn over the top of the right needle and around it in a counterclockwise direction.
- Push through. Use the right needle tip to push the loop back through the old stitch, then let the old stitch slip off the left needle.
Why purl feels awkward at first
Almost every beginner finds purl clumsier than knit. The motion is less natural for your hands, and the stitch can feel tighter. This is completely normal. A good approach is to dedicate a full practice session to purling alone. Cast on 20 stitches, purl every row, and let your muscle memory catch up. After a few hundred stitches, you will notice the awkwardness fade.
What happens when you combine them
Here is the magic that makes knitting so versatile. The same two stitches, arranged in different ways, create entirely different fabrics.
| Pattern name | How it is worked | What it looks like |
|---|---|---|
| Garter stitch | Knit every row | Bumpy horizontal ridges, lies flat |
| Stockinette stitch | Knit one row, purl one row | Smooth “V”s on the front, bumps on the back, edges curl |
| Ribbing (1×1) | Knit one, purl one across the row | Stretchy vertical columns |
| Seed stitch | Alternate knit and purl, offsetting each row | Pebbly, textured, lies flat |
Need some smooth yarn for textured practice? A light-colored skein shows every bump and V.
Shop Cotton Yarn9. Work Rows and Build Your First Fabric
Now comes the part that is most rewarding and, truthfully, a little repetitive: working row after row until your swatch becomes a real piece of fabric. This is where all the small movements you have practiced turn into something you can hold. The best first fabric is garter stitch, which simply means knitting every row. It looks charming, lies flat, and is wonderfully forgiving.
How rows work
At the end of each row, all your stitches have moved from the left needle to the right. You then turn your work around, swap the needles between hands, and the next row begins. Each row builds on the one below it, and the loops lock together. Two rows of garter stitch create one visible ridge, so if you count ridges, remember to multiply by two to get the number of rows.
Keeping your edges tidy
Beginners often end up with wavy, uneven edges. The usual causes are accidentally adding or dropping stitches, or pulling the yarn too tight at the start of each row. A good habit is to count your stitches at the end of every few rows. Work the first stitch of each row firmly but without yanking, and your sides will straighten out naturally.
Recognizing the front and back
In garter stitch, both sides look the same, which makes it an excellent learning fabric. When you move on to stockinette, you will want to know your right side from your wrong side. The right side shows smooth V shapes, while the wrong side shows bumps. A small safety pin or a coloured stitch marker on the right side can save you from getting confused.
Handling interruptions
Life will interrupt your knitting, and that is okay. When you put your project down, make sure the needles are secure. A rubber stopper on each needle point or a tidy project bag prevents stitches from escaping. When you return, look at where the working yarn is. If it is attached to the stitch on your right needle, you finished a row. If it is on the left, you are in the middle.
Fixing a dropped stitch
If you notice a stitch has slipped off the needle, do not panic. Stop knitting immediately, and put the stitch back on the needle. A small crochet hook makes the repair easy. Pull the dropped loop up through the ladder of horizontal strands above it, working from the bottom up, until it sits back on the needle. You will be amazed how quickly this becomes routine.
Keep your edges and counts on track. Stitch markers and small crochet hooks are lifesavers.
Shop Markers and Hooks10. Cast Off and Finish Your Piece
Casting off, also called binding off, locks your stitches so the fabric does not unravel. It is one of the most satisfying moments in knitting because it turns a work in progress into a finished object. The method is simple, and it takes only a few minutes to master.
The basic cast off
- Knit the first two stitches of the row, so you have two stitches on the right needle.
- Insert the left needle into the first stitch you knitted, the one farther from the tip.
- Lift that stitch up and over the second stitch, and drop it off the needle tip. One stitch is now bound off.
- Knit the next stitch from the left needle, so two stitches sit on the right needle again.
- Repeat the lift-and-drop motion until one stitch remains.
- Cut the yarn, leaving a tail of about 15 cm (6 inches). Pull the tail through the final loop and tighten it.
Keep your cast off loose enough
A very common problem is binding off too tightly, which makes the top edge pucker or pull the fabric inward. To avoid that, work each stitch with relaxed tension, or switch to a needle one size larger for the bind off row. The goal is an edge that stretches about as much as the rest of the piece. For a closer look at other finishing options, see our walkthrough on how to cast off knitting.
Weave in the loose ends
Once the cast off is complete, you will have two yarn tails: one at the cast-on edge and one at the cast-off edge. Thread each tail onto a tapestry needle and weave it through the back of the stitches for a few centimeters, in one direction and then back the other way. This locks the end in place so it will not poke out. Trim the leftover yarn close to the fabric, but not too close, since wool and other fibers can sometimes work loose.
Block it if you like
Blocking is the practice of gently wetting or steaming a finished piece and shaping it to its intended dimensions. It smooths out uneven stitches and makes edges lie flat. For your first swatch, it is optional, but it is a fascinating experiment because you will see how much a little moisture and patience can tidy up your work.
Finishing touches matter. Grab a blocking mat set and a pack of tapestry needles.
Shop Blocking Supplies11. Common Beginner Mistakes and How to Fix Them
Every knitter, no matter how experienced, has made every mistake on this list. Mistakes are not a sign that you are bad at knitting. They are simply how the craft is learned. The reassuring part is that most of them are easy to spot and easy to fix once you know what to look for.
| Problem | Likely cause | Quick fix |
|---|---|---|
| Stitch count keeps changing | Accidental yarn overs, splitting stitches, or skipping one | Count at the end of each row and unpick back to the last correct count |
| Holes in the fabric | Yarn carried over the needle by accident | Unknit a few stitches and redo them carefully |
| Fabric is very tight and stiff | Gripping the yarn or needles too hard | Relax your hands or try needles one size larger |
| Fabric looks loose and sloppy | Too much slack in the yarn or needles too large | Add a little tension and check the yarn label for suggested size |
| Edges are uneven or wavy | Inconsistent tension at row starts and ends | Pull the first stitch firmly and keep a steady rhythm |
| Twisted stitches | Wrapping the yarn the wrong direction | Wrap counterclockwise and check each stitch sits on the needle with the leading leg in front |
| Dropped stitch | Stitch slipped off the needle during a row | Use a small crochet hook to climb it back up |
Unknitting: your best friend
When you spot a mistake in the current row, you can undo it stitch by stitch. This is called tinking, which is “knit” spelled backwards. Insert the left needle into the stitch below, gently slide the right needle out of the top loop, and the stitch returns to the left needle. It is slow but safe, and it keeps your work intact.
Frogging when it all goes wrong
Sometimes the problem is too many rows back to fix one stitch at a time. In that case you can pull the needles out entirely and unravel the piece, a practice called frogging because you “rip it, rip it”. Wind the yarn back into a ball, give it a gentle shake to loosen the crimps, and begin again. No harm done, and in fact you have just gotten extra practice for free.
Mindset matters
The biggest obstacle for beginners is not a technique. It is perfectionism. A first swatch is allowed to look wobbly. Pin it up somewhere visible and save it. In three months, you will look back and be delighted at how far you have come. Compare your work today to your work last month, not to someone else’s polished photograph.
Helpful habits
- Count stitches regularly
- Work in good lighting
- Take stretch breaks for hands and shoulders
- Keep a small crochet hook handy
Habits to avoid
- Knitting when very tired or rushed
- Using dark, fuzzy yarn while learning
- Ignoring a mistake hoping it will vanish
- Gripping needles tightly for long stretches
Be ready for rescue missions. A bright reading light and a small hook make fixes far easier.
Shop Craft Lights12. Your First Projects and How to Keep Growing
Once you can cast on, knit, purl, and cast off, you have everything needed to begin real projects. The trick is picking something that feels achievable but not boring. A project that is too complicated can sap your confidence, while one that is endlessly repetitive can feel like homework.
Beginner project ideas
- A garter stitch dishcloth. It is small, quick and useful, and it gives you a finished object in an afternoon. Cotton yarn is a great choice here.
- A simple scarf. The classic first project. It teaches consistency over a long stretch, and every inch feels like progress.
- A cozy headband. Knit a rectangle, then sew the ends together. It is wearable and surprisingly satisfying.
- A small blanket square. Several squares can be stitched together later into a baby blanket or lap throw.
- A pot holder or coaster. Tiny projects are perfect for testing new stitch patterns.
If you want a detailed, row-by-row plan for that classic first make, our guide on starting a scarf is coming up in the “you may also like” section just below the conclusion.
Learn to read a pattern
Patterns use abbreviations to save space. You will see “k” for knit, “p” for purl, “st” for stitch, “CO” for cast on, and “BO” for bind off. Numbers after a letter mean to repeat that action that many times. Text inside asterisks or brackets means to repeat that section. It looks like a secret code at first, but a short glossary on the first page of most patterns will help you decode it quickly.
Understand gauge
Gauge is the number of stitches and rows that fit into a set measurement, usually ten centimeters or four inches. It matters most when you are making something that has to fit, like a hat or a sweater. Knit a small swatch, measure it, and compare it with the gauge printed in the pattern. If your swatch has more stitches than the pattern calls for, go up a needle size. If it has fewer, go down. A scarf or blanket is far more forgiving.
Find your people
Knitting is wonderfully social. Local yarn shops often host weekly knit nights, libraries sometimes run craft circles, and there are thriving online communities where you can share photos and ask questions. Having a friendly person nearby to rescue you from a tangle makes a big difference in the early days.
Build a simple practice routine
The fastest way to improve is consistency, not marathon sessions. Try aiming for fifteen to thirty minutes most days. Keep your project somewhere visible, such as beside your favorite chair, and you will find yourself picking it up during moments that used to be spent scrolling.
Set small, friendly goals
Big goals like “knit a sweater” can feel distant and discouraging. Smaller milestones keep you moving. Aim to finish one practice swatch in garter stitch, then one in stockinette, then one in ribbing. After that, make a dishcloth, then a scarf. Each finished piece teaches you something specific, whether it is keeping tension even, counting rows, or tidying up edges, and together they build a solid foundation.
Take care of your hands and posture
Knitting is gentle, but repetitive motion can tire your hands if you ignore the signals. Sit in a supportive chair, keep your shoulders loose, and rest your forearms on cushions or armrests. Every twenty minutes or so, put the needles down, stretch your fingers, and roll your wrists. If something starts to ache, stop for the day. Comfortable knitters are the ones who are still knitting years from now.
Store your yarn and tools well
A little organization protects your investment. Keep yarn in a cool, dry spot away from direct sunlight, which can fade colors, and store wool in a way that keeps moths out. Label leftover skeins with the fiber and needle size, so you remember what they are suited for. A simple basket or fabric bin by your chair keeps a work in progress ready to grab at a moment’s notice.
Ready for your first project? Explore beginner pattern books and project kits.
Shop Pattern BooksFrequently Asked Questions About Starting to Knit
How long does it take to learn to knit?
Most people can cast on, knit a row and cast off within a single afternoon. Feeling comfortable usually takes a few weeks of short, regular practice. Making something you are proud of, like a simple scarf, is realistic within a month or two for most beginners.
Is knitting hard for beginners?
Knitting looks harder than it is. It relies on just two core stitches, and the early learning curve is mostly about training your hands to coordinate. With smooth yarn and medium-sized needles, many people find it surprisingly approachable.
What do I need to start knitting?
You need yarn, a pair of knitting needles, scissors and a tapestry needle for finishing. A tape measure, stitch markers and a row counter are helpful extras, but you can add them as you go.
What is the best yarn for a first project?
A smooth, light-colored, medium-weight yarn in wool, cotton or acrylic is ideal. Avoid very dark, fuzzy or novelty yarns, since they hide stitches and make mistakes much harder to spot.
What size needles should a beginner use?
For medium-weight yarn, most beginners do well with needles in the mid-range of about 5 to 6.5 mm. Slightly larger needles give looser stitches that are easier to work into. Always check the yarn label for a recommended size as a starting point.
Should I learn English or Continental knitting first?
Either is fine. English style holds the yarn in the right hand and is often considered more intuitive for beginners, while Continental holds the yarn in the left and can be faster once mastered. Try both and keep whichever feels more natural.
Why are my stitches so tight?
Tight stitches usually come from gripping the yarn or needles too firmly, or from casting on too snugly. Relax your hands, loosen your tension slightly and consider trying a larger needle size. Tension relaxes naturally with practice.
Why does my knitting get wider or narrower as I go?
This almost always means the stitch count is changing. You may be accidentally adding a stitch by wrapping the yarn twice, or dropping one by skipping a loop. Count your stitches at the end of every few rows to catch it early.
How do I fix a mistake in my knitting?
For a mistake in the current row, undo stitch by stitch until you reach the error, which is called tinking. For a mistake several rows down, you can use a small crochet hook to climb a dropped stitch back up, or unravel the whole section and start again.
What is the difference between knit and purl stitches?
They are mirror images. A knit stitch is worked with the yarn at the back and shows a V shape on the front of the fabric. A purl stitch is worked with the yarn at the front and creates a small bump. Combining them creates patterns like ribbing and stockinette.
Why does my knitting curl at the edges?
Stockinette stitch naturally curls because the front and back have different structures. Garter stitch, which is knit on every row, lies flat, so it is a good choice for beginner scarves and blankets. Blocking and adding a border can also tame curling edges.
What should I make first?
A garter stitch dishcloth or a simple scarf is the classic choice. Both use only the knit stitch, require little shaping, and give you a useful finished item to enjoy while you build confidence.
Conclusion: Your Knitting Journey Starts With One Loop
Learning to knit is less about talent and more about showing up with a little patience. You now know what to buy, how to choose beginner-friendly yarn and needles, and how to move through each core skill: the slip knot, casting on, the knit stitch, the purl stitch, working rows, and casting off. You also know how to handle the inevitable mistakes with a calm head and a small crochet hook.
The most important step is the one that comes next. Grab your yarn, cast on twenty stitches, and give yourself permission to be a beginner. Your first piece will not be perfect, and that is exactly what will make it special. Before long, those two basic stitches will carry you into scarves, hats, blankets and well beyond.
Take the first stitch today. Start with everything you need in one place.
Get Your Beginner Knitting Kit