
There is a specific sound a knitter makes when they spot a mistake twelve rows back. It is not a gasp. It is quieter than that — a slow exhale, a long look at the ceiling, and then the question: do I fix it, or do I live with it?
Here is the good news, and it is genuinely good: almost every knitting mistake that feels catastrophic is repairable, and most repairs take less time than you fear. A dropped stitch is not a ruined sweater. A hole where a yarn-over should have been is not a reason to abandon a shawl. Even a twisted cable or a mis-crossed decrease has a remedy once you understand what the fabric is actually doing.
The reason mistakes feel so intimidating is that knitting hides its own logic. Each loop is pulled through the loop below it, which means a single error is structurally connected to everything above and below. When you don’t yet read that structure, a mistake looks like random damage. When you do read it, it looks like a loose thread waiting to be pulled into place. That is the entire skill this guide is built around: learning to see the architecture of your fabric so the fix becomes obvious.
Whether you learned yesterday from how to start knitting or you have decades of sweaters behind you, the process is the same. Slow down. Read the fabric. Decide how deep the problem goes. Choose the gentlest repair that actually solves it. Then keep going.
In the sections below, we will work through a complete rescue system: how to diagnose what went wrong, how to fix the seven most common disasters in order of severity, how to prevent them from happening again, and how to decide — honestly — when a mistake is worth leaving alone. Every major step comes with a diagram so you can see exactly where the hook, needle, and yarn need to go.
What you will be able to do by the end
- Read a knitted fabric and locate a mistake without unpicking anything.
- Climb a dropped stitch back into place in both knit and purl fabric.
- Tink, frog, and use a lifeline — and know which one the situation calls for.
- Repair tension problems, split yarn, twisted stitches, and mis-crossed cables.
- Fix lace and colorwork errors without destroying the surrounding pattern.
- Build habits that make future mistakes rare, small, and easy to spot early.
Watch: Fixing Common Knitting Mistakes, Step by Step
Reading about a repair is useful; watching a pair of hands do it once is often the moment it clicks. The video below walks through the most common rescue moves — spotting the error, catching the loop, and laddering it back up — so you can see the pace and angle of the tools in real time.
Takeaway: the hook does the work, not your fingers. Keep the ladder rungs loose, climb one rung at a time, and re-seat the final loop on the left needle with its right leg facing forward.
Why Knitting Mistakes Happen — and How to Read Your Fabric Like a Detective
Before you can fix anything, you have to see it. And before you can see it properly, you need to understand what a knitted fabric actually is: a grid of interlocking loops, one per stitch, one column per stitch, one row per row. Every mistake is a disruption somewhere on that grid.
Nearly all knitting errors fall into a handful of families. There are structural errors — a stitch dropped off the needle and left to unravel into a ladder. There are counting errors — an extra stitch created, a decrease missed, a repeat done twice. There are orientation errors — a stitch mounted or worked the wrong way so it twists. And there are pattern errors — a yarn-over where it shouldn’t be, a cable cross in the wrong direction, a colour carried over the wrong number of stitches.
Notice what all four have in common: they are visible in the fabric if you know how to look. That is the real skill. Not speed, not tension wizardry — reading.
The anatomy of a stitch
A knit stitch on the front of the work looks like a tidy letter V. The two sides of that V are the legs. The right leg (the one on the right when you look at the fabric face-on) sits on the front of the needle when a stitch is mounted correctly. The bottom of the V is the head of the loop below, and the horizontal bar connecting two stitches in the row beneath is what you grab when you ladder up a dropped stitch.
Diagram 1 — Every V is one stitch, every column is one stitch wide, every horizontal band is one row.
Counting is the fastest diagnostic tool you own
When something looks wrong, resist the urge to unpick. Count first. Count the stitches on your needle against the pattern. Count the rows from the cast-on edge to the needle. Count the repeats of a lace or cable chart across the width. Ninety seconds of counting will tell you whether you are looking at a dropped stitch (count is still right, but a ladder appears), an extra stitch (count is too high), or a missed decrease (count is too low).
Row counting matters more than knitters expect. If a sleeve is supposed to be twenty-four rows deep and you have twenty-nine, you have not made one mistake — you have made five unrecorded ones, and they are all sitting quietly in the fabric. Learn to count rows by reading the fabric rather than trusting your memory, and half your troubleshooting disappears.
Diagram 2 — Rows are counted sideways across the fabric, stitches are counted up the columns.
Good light matters more than knitters admit. So much “mystery damage” turns out to be a split strand of yarn that you simply could not see. If you often knit in the evening, a dedicated task light is one of the cheapest accuracy upgrades available, and we cover the options in our guide to the best knitting light.
Why mistakes cluster
Errors rarely arrive alone. They cluster at transitions: the first row after a colour change, the row where a cable cross happens, the moment you put the work down mid-row and pick it up hours later. They cluster when you are tired, distracted, or knitting faster than your attention can follow. Knowing your personal risk zones lets you slow down precisely where slowing down pays off.
Build a Fix-It Toolkit Before You Need It
Every knitter eventually assembles a repair kit. The only question is whether you do it calmly in advance, or in a panic at eleven at night with a dropped stitch slowly crawling down your sweater.
The good news is that a serious repair kit fits in a small pouch and costs very little. Most of it you may already own. Keep it with the project, not in a drawer in another room, and the psychological difference is remarkable: mistakes stop being emergencies and become tasks.
The seven essentials
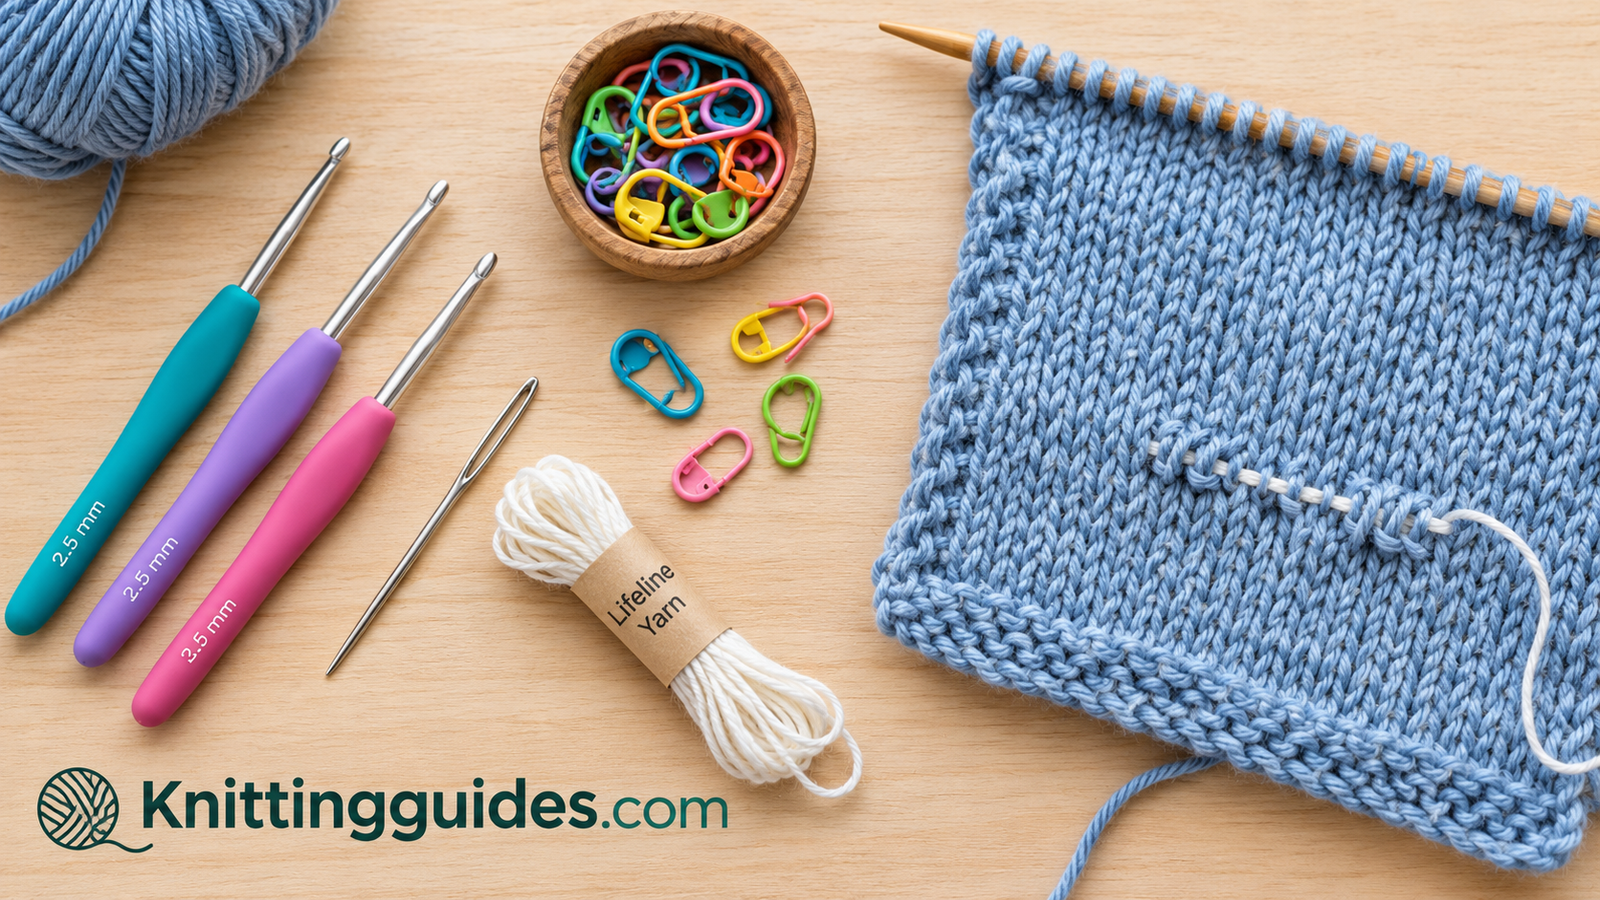
- A small crochet hook — around the same size as your needle or slightly smaller. This is the single most useful rescue tool in knitting. It catches ladders, pulls dropped loops up through the fabric, and grabs yarn you cannot reach with a needle tip.
- Blunt tapestry needles — a couple of sizes, in metal and plastic, for lifelines, duplicate stitch, and weaving in ends after a repair.
- Locking stitch markers — the kind that open and close. They hold live stitches when you drop one deliberately, and they mark repeats so errors stay local.
- Smooth waste yarn in a contrasting colour — this becomes your lifeline. Choose something slippery and much thinner than your project yarn so it slides out easily later.
- A row counter or a notebook — the humblest tool in the list and the one that prevents the most damage.
- A small ruler or needle gauge — for verifying needle size after a swap and measuring how far a mistake has travelled.
- Good light — because you cannot fix what you cannot see.
Diagram 3 — Four tools solve the vast majority of knitting problems.
Choosing the right hook
Steel hooks are excellent for fine yarns and socks because they are slim and precise. For worsted and chunky projects, a slightly larger hook with a comfortable grip is easier on your hands. The hook should be small enough to slide into a stitch comfortably but large enough not to split your yarn on the way through. If you are not sure what sizes you need, a small set covers you for almost everything.
One tool that surprises people: a crochet hook is also the reason many knitters eventually try crochet for edgings and repairs. If you have ever wondered how the two crafts compare in difficulty, our comparison of crochet vs knitting covers it honestly.
Setting up before you cast on
Two minutes of setup prevents hours of repair. Before the first row, decide where your lifelines will go and how often you will count. If you are starting a project with a stretchy or complex cast-on, make sure that foundation is solid first — our walkthrough of how to cast on knitting covers the methods that behave best under stress. And if you are choosing tools for a new project, the right needle makes corrections far less painful; see our guide to the best knitting needles for beginners.
Step 1: Stop, Breathe, and Identify the Exact Mistake
Diagnose before you touch anything
The most common repair mistake is fixing the wrong thing. A knitter sees a hole, assumes a dropped stitch, spends twenty minutes laddering up the wrong column, and ends up with two problems instead of one. Diagnosis first. Always.
Put the work down on a flat, well-lit surface. Straighten the fabric so the stitches sit naturally, without stretching it — stretched fabric distorts the shape of the loops and makes everything look worse than it is. Then work through the diagnostic sequence below.
The five-question check
- Is the stitch count correct? Count the live stitches on the needle against the pattern.
- Is there a ladder? A column of loose horizontal bars means a dropped stitch somewhere below.
- Is there a hole with no ladder? That is usually a missing yarn-over, an accidental yarn-over, or a split strand that has separated.
- Is a stitch twisted or crossing its neighbour? Look for legs that overlap instead of sitting side by side.
- How many rows back does the problem go? This determines which repair method you use.
Diagram 4 — Scan the fabric in horizontal passes. The ladder tells you exactly where the damage starts.
Mark the spot, then walk away
Once you have found the problem, clip a locking marker through the offending stitch or one row below it. This does something surprisingly important: it stops the error from becoming invisible again the moment you put the work down. Mistakes have a talent for hiding when you look away.
Then walk away for five minutes. This is not sentimentality. Repair work requires steady hands and calm attention, and the urge to “just fix it now” is what turns a small ladder into a tangled mess. Have a drink of water. Come back. The fabric will look different when you are not angry at it.
Decide the depth of the fix
| What you see | What it usually is | Depth of fix | Method |
|---|---|---|---|
| Loose ladder, correct stitch count | Dropped stitch | Local | Crochet hook rescue |
| One row looks messy or tight | Tension drift | Local to one row | Redistribute slack by hand |
| Hole with no ladder | Missing or extra yarn-over | One to three rows | Tink back to the error |
| Stitch count wrong | Missed decrease or extra increase | Several rows | Tink or frog to the source |
| Crossed or leaning stitch | Twisted stitch / wrong mount | One row | Re-work or re-mount |
| Pattern repeat is off | Chart misread | Potentially many rows | Frog to a lifeline |
Rule of thumb: always choose the shallowest fix that genuinely solves the problem. Depth is time.
Step 2: Rescue a Dropped Stitch With a Crochet Hook
Climb the ladder one rung at a time
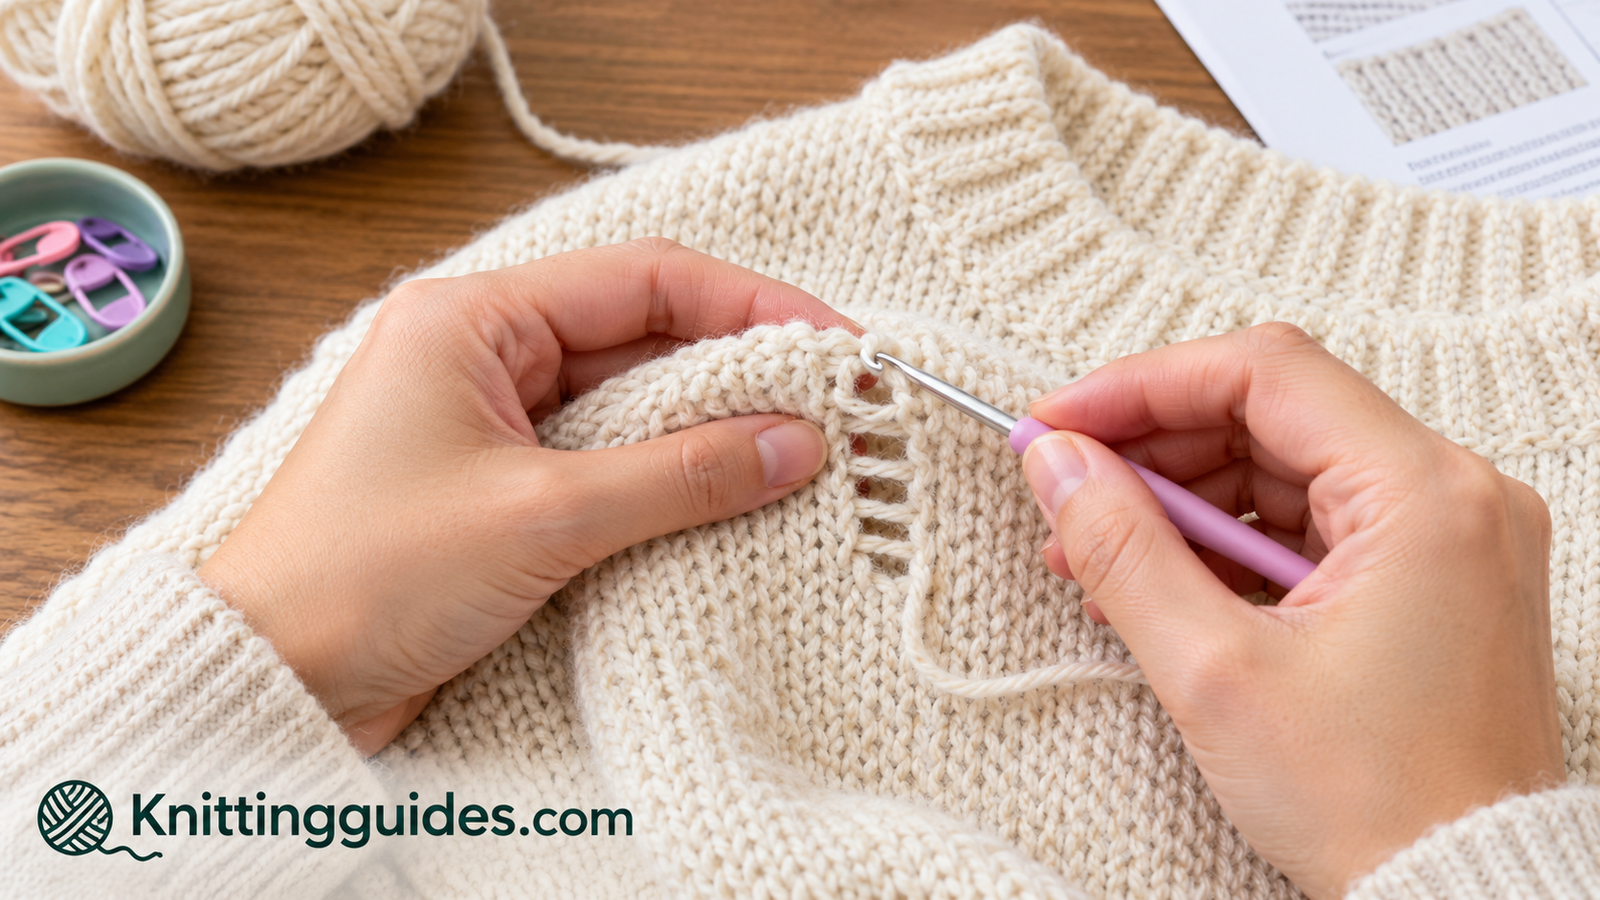
A dropped stitch is the most common knitting disaster and, once you have done it a few times, the most satisfying repair in the craft. There is a real pleasure in watching a hole close up under a crochet hook.
When a stitch slips off the needle and you keep knitting, it does not vanish. It simply stops being a stitch and becomes a series of loose horizontal bars — one for every row you have worked since it escaped. Those bars are the loops it should have been worked into. Your job is to pull each one through the next, in order, until the live loop reaches the needle again.
Before you start
- Insert a locking marker or a spare needle through the live loop at the bottom of the ladder so it cannot run further.
- Count the rungs. That number tells you how many rows back the mistake begins.
- Look at the fabric on either side. If it is smooth V shapes, you are laddering up knit fabric. If it looks like little bumps, it is purl fabric, and the hook comes from the other side.
- Do not pull the fabric tight. Loose rungs are much easier to work with than taut ones.
Diagram 5 — The hook catches the lowest loose rung and pulls it through the live loop, working upward.
Laddering up knit fabric
Slide the crochet hook into the live loop from front to back, with the hook facing down. Reach over the first loose rung, hook it from behind, and pull it through the loop on your hook. You now have a new live loop and one fewer rung. Repeat all the way up until the loop is level with the needle.
Keep the hook pointed downward as it passes through each loop. That single detail solves most of the frustration beginners experience, because it prevents the hook from catching neighbouring strands and splitting the yarn.
Laddering up purl fabric
Purl fabric is the same process from the other side. Either turn your work around so you are looking at the knit side of the fabric and ladder up normally, or insert the hook from the back so it catches each rung in the purl direction. Turning the work is far easier for most people and produces a tidier result.
Diagram 6 — Knit and purl fabric are rescued the same way; only the hook direction changes.
Re-seating the loop on the needle
When the loop reaches the top, place it back on the left needle. Check its orientation: the right leg should sit at the front of the needle, matching the stitches beside it. If it is mounted the other way, it will look twisted in the finished fabric, and you will have a new small problem to solve. Slide it on, knit it in pattern, and the rescue is complete.
What if the ladder has been there a long time?
Older ladders are looser and sometimes the rungs have shifted sideways. Work slowly, and use your fingers to gently massage the surrounding stitches back into shape after the rescue. Blocking later will finish the job; more on that in the final section.
Step 3: Fix Tension Problems, Split Yarn, and Messy Stitches
Even out what is already knitted
Not every problem needs to be ripped out. Uneven tension — that telltale row where some stitches are tight and others are loose — is almost always fixable after the fact, with nothing more than your fingers and a little patience.
Tension drifts for ordinary reasons. You started knitting while tense and relaxed later. You changed needle material mid-project. You knit the first few rows of a new section more tightly because you were concentrating. The result is a visible band where the fabric density changes. It looks permanent. It is not.
Redistributing slack across a row
Working on the right side of the fabric, insert the tip of a spare needle into the row of loose stitches. Then, stitch by stitch, pull the extra yarn along the row to the right, letting each loop absorb a little of the surplus. Think of it as passing a small bubble of slack down a chain. Eventually the bubble reaches the end of the row where the working yarn is, and it disappears into the edge.
Diagram 7 — Slack travels sideways through the loops. Nothing is unworked.
Split yarn: the invisible enemy
Split yarn is what happens when the needle tip pierces one ply of a multi-ply yarn instead of passing under the whole strand. The stitch looks slightly frayed, the fabric has a tiny pale spot, and the stitch is weaker than its neighbours. Fuzzy, single-ply, and loosely spun yarns split most often.
- One or two rows back: tink back and re-work the stitch, making sure the needle passes under every ply.
- Several rows back and barely visible: leave it. Block it out and see whether it disappears.
- Structurally weak or in a high-stress area: re-work it. A split strand in a shoulder seam will fail eventually.
The yarn you choose has a huge effect on how often this happens. Smooth, tightly plied yarns forgive clumsy needle tips; delicate singles do not. If splits are a recurring problem for you, our guide to the best yarn for beginner knitting points at forgiving options, and the needle size guide explains how needle and yarn pairing affects stitch definition.
Row gauge drift
Sometimes the problem is not one row but many: your gauge changed partway through and the piece is now wider, narrower, or longer than intended. If you are early in the project, this is worth addressing by re-knitting the affected section. If you are far along, consider whether the change can be absorbed in blocking or in seaming. Small gauge shifts of a fraction of a stitch per inch often vanish under the steam iron and a firm stretch.
Fixing tension in place
- No un-knitting required
- Takes only minutes
- Works on very old fabric
- Completely invisible when done well
Where it falls short
- Cannot fix wrong stitch counts
- Large gauge shifts need re-knitting
- Over-working can felt delicate yarn
- Won’t correct pattern errors
Step 4: Tink — Undo Stitches One at a Time
Knit backwards, deliberately
Tinking is “knit” spelled backwards, and it is exactly what it sounds like: un-working your knitting one stitch at a time, in reverse, with the yarn still attached. It is the safest form of undoing and the right choice whenever the mistake is close to the needle.
Tinking is slow. That is its strength. Because every stitch is released individually and immediately re-seated on the left needle, there is almost no risk of dropping stitches, losing your place, or creating a tangle. For errors within the last one to five rows, it beats frogging every time.
How to tink a knit stitch
Hold the needle with the live stitches in your left hand. Insert the tip of the right needle into the stitch below the one on the left needle — into the loop that the working yarn is coming out of. Gently pull the working yarn so the stitch on the left needle pops off and the loop below comes free. Then transfer that freed loop onto the left needle. You have un-worked one stitch.
Repeat across the row. When you reach the end of a row, the working yarn will now come from the far end; turn your work and continue on the next row back.
Diagram 8 — The right needle catches the loop below, the old stitch is released, and the loop returns to the left needle.
How to tink a purl stitch
Purl tinking follows the same logic with the yarn in front. Insert the right needle into the loop below from the appropriate side so that the purl bump is captured correctly, release the stitch, and return the loop to the left needle. Many knitters find it easier to turn the work and tink from the knit side wherever possible; there is no rule against it, and the result is identical.
Special cases
Yarn-overs
A yarn-over is not anchored to anything below it, so un-working it is simply a matter of slipping it off the needle and letting the strand drop. Do this before you tackle the neighbouring stitches, not after, or you will lose track of where it was.
Decreases and increases
A decrease such as knitting two together un-works as one unit: you will release two stitches but only recover one loop on the left needle, then you must manually return the second stitch. Work slowly here, and use a locking marker to hold the pair together while you figure out the orientation.
Cables
Tinking across a cable cross is fiddly because stitches have been physically rearranged. If the cable is more than one row below the needle, it is usually faster to tink to just above the cable and then re-cross it correctly using a spare needle, rather than un-working the cross itself.
Keeping your place while you tink
Count aloud. It sounds silly and it works. Losing count mid-tink is how a three-stitch correction becomes a fifteen-stitch correction. If you are un-working a long stretch, place a marker every ten stitches so you can verify where you are at a glance.
When to tink and when not to
- Tink when the error is within a few rows, in textured or lace fabric, or in a yarn that tangles easily.
- Frog when the error is many rows back and the fabric is plain stockinette or garter.
- Never tink mohair or other grippy fibres more than a row or two — the fabric will felt itself into a solid mass.
Step 5: Frog Back to a Lifeline (The Controlled Rip)
Undo whole rows safely
Frogging gets its name from the sound: you “rip it, rip it.” Pulling out rows of knitting is fast, dramatic, and occasionally terrifying. Done with a lifeline in place, it is perfectly safe. Done without one, it is an adventure.
Frogging is the right tool when the mistake is many rows below the needle and the fabric is simple. Un-working forty rows stitch by stitch would take hours; pulling them out takes seconds. The trade-off is control: once the yarn is flying, mistakes can multiply if the live stitches are not secured.
What a lifeline is
A lifeline is a length of smooth waste yarn threaded through every live stitch at a known row. It acts as a floor. When you rip back, the stitches cannot unravel past it, because each one is caught on the thread. It is the single most valuable safety device in knitting.
Diagram 9 — Thread the lifeline through the full width of a plain row with a blunt tapestry needle.
Placing a lifeline
- Cut a length of smooth waste yarn about three times the width of your piece.
- Thread it onto a blunt tapestry needle.
- Working on a plain row — no yarn-overs, no decreases — run the needle through every stitch on the needle, from tip to tip.
- Leave long tails at both ends and tie them loosely to the fabric edges so the line cannot slip out.
- Knit on. When the piece is finished and blocked, the lifeline pulls free without resistance.
The rip itself
Remove the needle and begin pulling the working yarn. The rows will release quickly. Go slowly once you are within about five rows of the lifeline — the last few rows are where stitches twist and jump. When you reach the lifeline, stop and put each held stitch back on the needle one at a time, checking orientation as you go.
Diagram 10 — The lifeline acts as a floor; everything above it comes away cleanly.
Alternative safety nets
- Circular needle cables: if you are knitting on circulars, threading a lifeline is often unnecessary for short rips, because the cable holds the stitches. Rip back a few rows at a time and re-seat.
- Interchangeable needle systems: many sets have a small hole in the cable through which you can run lifeline yarn as you knit, automatically. This is one of the genuinely useful features of a good set; see our comparison of Addi Click vs ChiaoGoo interchangeable needles or our broader look at the best interchangeable knitting needle sets.
- Afterthought lifelines: if you did not place one in advance and disaster strikes, you can still thread a lifeline into a plain row below the problem before you rip. It takes patience and good light, and it is worth every second.
By the way, if you are still choosing between needle types for a project where mistakes are likely, our guide to circular vs straight knitting needles explains which behaves better when you need to rip back.
Step 6: Correct Twisted Stitches and Crossed Stitches
Untwist what should be open
A twisted stitch is subtle. It looks almost right, but the fabric leans slightly, the stitch appears to pinch at the base, and the column it belongs to pulls tighter than its neighbours. In small numbers it is invisible. In large numbers it changes the drape of the whole fabric.
Stitches twist for one of two reasons: they were mounted on the needle the wrong way, or they were worked through the wrong leg. Most often this happens after picking up dropped stitches, after a long interruption, or when a knitter switches between English and continental style.
Spotting the difference
Look at the V. In an untwisted knit stitch, the left and right legs cross at the base and open outward like a small pair of wings. In a twisted stitch, the legs cross over each other so the loop closes into a narrow figure-eight at the bottom. The fabric around a twisted stitch also puckers very slightly.
Diagram 11 — The base of the loop tells you everything about how the stitch was mounted.
Fixing a twisted stitch on the current row
If you catch it before you work it, the fix takes two seconds. Slip the stitch back to the left needle, then slide the right needle through it from the other direction so the legs swap places. Knit it normally. Done.
Fixing a twisted stitch a few rows down
You have three options, in order of preference:
- Tink back to it. Best when the twisted stitch is within a couple of rows and clearly visible.
- Drop just that stitch and ladder it back up. Unusual but effective: deliberately drop the single stitch down to the row below the twist, then re-work it with a crochet hook in the correct orientation. This is precise and leaves the surrounding fabric untouched.
- Leave it. A single twisted stitch in a large piece is genuinely invisible once blocked. This is a legitimate choice.
Crossed stitches on purpose
Crossed stitches are not always mistakes. Small cables, twisted ribbing, and Bavarian travelling stitches all use crossed stitches deliberately. The question is whether the crossing is consistent. If a pattern calls for a left-leaning cross and you have worked a right-leaning one three times out of ten, that inconsistency is what makes the fabric look uneven — and it is worth correcting.
Step 7: Fix Mistakes in Lace, Cables, and Colorwork
Advanced fabric, targeted repairs
Lace, cables, and colourwork each have their own failure modes, and each demands a slightly different repair strategy. The good news is that all three are more forgiving than they look once you can read the chart against the fabric.
Lace: the yarn-over problem
Most lace errors come down to one thing — a yarn-over in the wrong place, or a missing one. Because yarn-overs create the holes that define lace, an error changes the stitch count and shifts every subsequent repeat.
- Missing yarn-over: a hole is absent and the count is one low. If the yarn-over is on the current row, simply make it. If it is below, you can sometimes create it by pulling a strand of the row below up and over the needle — a trick that works only in certain stitch patterns. Otherwise, tink back.
- Extra yarn-over: a hole appears where none should, and the count is one high. On the next row, work it together with a neighbouring stitch to absorb it, or tink back and remove it.
- Wrong decrease: a left-leaning decrease worked as a right-leaning one changes the direction of a pattern line. Usually worth re-working, because lace is directional.
Working from a chart makes this far easier, because you can compare the symbols on paper against the stitches on the needle line by line. If charts still feel intimidating, our guide to how to read a knitting pattern breaks the symbols down.
Cables: the mis-cross
Cables fail in a specific way: the cross goes in the wrong direction, or the cross happens at the wrong row, or stitches get re-ordered without being worked. The result is a cable that leans the wrong way or appears to break.
Diagram 12 — Compare the direction of travel in the fabric against the chart symbol before you un-knit anything.
You do not always have to un-knit a cable to fix it. If the cross is on the current row, you can drop just the cable stitches down to the row below the cross, then re-cross them on a spare needle and ladder them back up. It is delicate work but it avoids un-working dozens of plain stitches.
Colourwork: floats, tension, and wrong colours
Colourwork — stranded knitting, fair isle, intarsia — has three common problems.
- Tight floats. The yarn carried across the back is too short, puckering the fabric. Fix by working a few stitches, then gently stretching the fabric sideways to redistribute the float length. For old puckers, blocking resolves most of it.
- Long floats. Anything longer than a few stitches should be caught, or it will snag. If you have already knitted past it, you can tack the float down afterwards with a tapestry needle on the wrong side.
- Wrong colour in a single stitch. A single misplaced colour can be corrected later with duplicate stitch rather than un-working the row — covered in the final section.
Diagram 13 — Floats are where colourwork mistakes live. Keep them loose and even.
Colourwork in the round brings its own quirks, particularly at the junction where the round begins. If you are working a colourwork project on circular needles, our beginner’s guide to how to knit in the round covers jog management and marker placement, both of which prevent a surprising number of errors.
Fixing Edge, Cast-On, and Bind-Off Mistakes
Edges are where knitting errors are most visible and most structural. A wobbly cast-on, a too-tight bind-off, or a dropped edge stitch will show in the finished piece no matter how perfect the body of the fabric is.
Cast-on problems
Cast-on errors fall into two categories: wrong stitch count and wrong tension. A wrong count is worth re-doing immediately — counting after the first row is the cheapest possible moment to catch it. A too-tight cast-on is more insidious: it creates a firm ridge that refuses to stretch, which is disastrous on a sock cuff or a sweater neck.
- Too tight? Cast on over two needles held together, or go up a needle size for the cast-on row only.
- Twisted before joining in the round? Every knitter has done this. The fix is to un-twist the loop or, if the twist is small and near the join, drop the affected stitches, untwist, and re-work them.
- Uneven loops? Consistency comes from keeping your tension hand steady and counting as you go. If the piece is small, re-doing it takes five minutes.
If you want to revisit the foundations, our step-by-step on how to cast on knitting covers stretchy and decorative methods in detail, and the companion piece on how to cast off knitting handles the other end of the piece.
Bind-off problems
The most common bind-off mistake is tension: a bind-off worked more tightly than the fabric below it. You can see it as a puckered edge. Depending on the situation, you have a few options.
| Bind-off issue | How it looks | Best fix | Time cost |
|---|---|---|---|
| Too tight | Edge puckers, fabric will not stretch | Re-bind off more loosely, or use a stretchy method | Low to medium |
| Too loose | Edge flares and looks wavy | Re-bind off with a smaller needle | Low |
| Wrong stitch count | Edge does not match the piece | Un-bind and re-work the last row | Medium |
| Visible jog at the join | Step at the start and end of the edge | Blend with an invisible join on the final stitch | Very low |
Un-binding is easier than most knitters expect: simply unpick the final stitch chain from one end to the other and return the live loops to the needle.
Edge stitches that have slipped
A slipped edge stitch creates a ladder at the very border of the work. Because it is at the edge, you can often fix it without any un-knitting: use a crochet hook to pull the loose rungs up into the edge stitch, then tighten the last stitch of the next row to absorb the slack. If the piece will be seamed, the seaming will hide most edge irregularities entirely.
When the edge is structural
Button bands, neckbands, and picked-up edges are load-bearing. Errors here affect fit and longevity, and they are worth correcting properly rather than disguising. If a neckband is too tight, the honest fix is to re-knit it with more stitches or a looser bind-off. Blocking can improve an edge; it cannot add fabric that was never there.
Prevention Systems: Lifelines, Markers, Counters, and Good Habits
Every minute spent on prevention saves ten spent on repair. That is not an exaggeration — it is roughly how the arithmetic works out once you have lived through a full lace shawl that needed re-knitting.
The best knitters are not the ones who never make mistakes. They are the ones who catch mistakes early, while the fix is shallow. Prevention is really just early detection plus good tooling.
The habit stack
- Count at the end of every row or round. Do it out loud or with a counter. This single habit prevents the majority of disaster.
- Place a lifeline before every complex section. Lace panels, cable sections, colourwork — one lifeline before each, without exception.
- Mark pattern repeats. A marker at each repeat means an error stays inside one repeat instead of propagating across the piece.
- Read ahead. Look at the next row before you work it, especially in charts. Ten seconds of reading prevents most mis-crosses.
- Stop at a natural pause. Never put work down mid-row if you can help it. If you must, place a marker at the point you stopped.
- Check your work after a break. The first row after a pause is the highest-risk row in any project.
Diagram 14 — A layered safety system: markers contain errors, counters reveal them, lifelines limit them.
Choosing tools that reduce errors
Tool choice genuinely affects accuracy. Needles with blunt tips split less yarn but are slower in fine lace; sharp tips are precise but unforgiving of careless insertion. Needle material matters too — slippery metal is fast but lets stitches escape, while wood grips the yarn and holds stitches in place during interruptions. The right answer depends on the project and on your hands.
Yarn choice is just as important. Highly variegated or very dark yarn hides errors, which sounds useful but actually works against you: you will not see the mistake until it is far too late to fix cheaply. For complex work, choose a light, solid colour with clear stitch definition.
Managing the risky moments
| Risky moment | Why it goes wrong | Prevention |
|---|---|---|
| First row after a break | You have forgotten your place | Mark the stopping point; re-read the pattern before starting |
| Pattern transitions | Chart or repeat changes | Place markers at every transition |
| Colour changes | Old yarn carried accidentally | Cut or drop the old colour and verify the first row |
| Knitting while distracted | Attention drifts from the count | Work plain sections only; save complex rows for quiet time |
| Trying to knit quickly | Speed outpaces accuracy | Slow down at every increase, decrease, and cross |
And there is one more argument for a calm approach: knitting is genuinely good for you. Beyond the finished object, the repetitive motion and focused attention have real cognitive and emotional benefits — we cover the research in our piece on whether knitting is good for the brain. Mistakes are part of that process, not a failure of it.
If you are at the stage of building your first projects and want a low-risk place to practise these habits, a simple scarf is ideal — see how to start knitting a scarf.
Disguise, Embrace, and Finish: What to Do When the Fix Isn’t Worth It
There is one more skill, and it might be the most important one: knowing when to stop fixing. Not every mistake deserves your time. Some are invisible to everyone but you. Some are better disguised than corrected. And some become the detail that makes a handmade object feel handmade.
Duplicate stitch: the surgical fix
Duplicate stitch — also called Swiss darning — means tracing over an existing stitch with a tapestry needle and a length of the same yarn, following the exact path of the original loop. Done carefully, it is invisible. It is the ideal fix for a single wrong-colour stitch in colourwork, a small worn patch, or a spot where the yarn split and thinned.
Diagram 15 — Trace the V of the stitch below, then return to where you started.
Other disguises worth knowing
- Felting a join: with animal fibres, you can felt two ends together for an invisible join, useful when a repair involves re-joining yarn.
- Swiss darning over thin spots: reinforces worn elbows and heels before they become holes.
- Surface embroidery: a small motif worked over a blemish can turn a problem into a design detail.
- Seaming and blocking: many irregularities simply disappear when a piece is assembled and finished properly.
Blocking: the great evener-out
Blocking is the process of wetting or steaming a finished piece and shaping it to its final dimensions. It evens out tension, opens lace, settles colourwork, and softens the small evidence of repairs. If you have just fixed a ladder or redistributed tension, blocking is the step that makes the fix disappear completely.
- Wet block by soaking in lukewarm water with a gentle wash, then pressing out excess moisture in a towel.
- Lay the piece flat and pin it to shape, starting at the corners and working inward.
- Let it dry completely before unpinning. Rushing this step undoes everything.
- For steam blocking, hover the iron and use bursts of steam without pressing directly on the fabric.
Diagram 16 — Blocking settles the stitches and hides the last traces of repair work.
When to leave a mistake alone
Use this honest checklist. If most answers are “yes”, leave the mistake and move on.
- Can I see it only because I know exactly where it is?
- Would someone wearing or using this item ever notice it?
- Is the fix likely to take longer than re-knitting the section?
- Will fixing it weaken the fabric in that area?
- Am I at risk of making the problem worse by working the fabric again?
There is a long tradition in textile crafts of deliberately leaving a small imperfection. Whatever the folklore around it, the practical wisdom is sound: perfectionism is the fastest route to abandoning a project. The goal is a finished, useful, beautiful object — not a flawless one.
Frequently Asked Questions About Fixing Knitting Mistakes
How far back is too far to fix a knitting mistake?+
There is no fixed limit, but there is an honest cost calculation. If the error is more than about ten rows back in plain fabric, frogging to a lifeline is usually faster than any other approach. If it is in complex lace or cables, the answer depends on how much of the pattern would need re-working. Ask yourself whether the repair will take longer than re-knitting the section — if so, and the yarn survives being ripped, re-knitting is often the calmer option.
Can I fix a dropped stitch without a crochet hook?+
Yes, but it is harder. A spare knitting needle tip, a tapestry needle, or even your fingers can pull the rungs through, though it is slower and more likely to split the yarn. This is exactly why a small crochet hook is the first item in any repair kit. Once you have used one for a rescue, you will never be without it again.
Will blocking hide a fixed mistake?+
Blocking hides a great deal. It evens out tension differences, settles laddered stitches back into place, and softens the small visual disturbances that come from working an area twice. It will not fix structural problems such as a wrong stitch count or a missing yarn-over, but it is remarkably effective at making competent repairs invisible.
Should I tink or frog?+
Tink when the mistake is close to the needle, when the fabric is textured, lace, or colourwork, or when the yarn tangles easily. Frog when the mistake is many rows back and the fabric is plain. If in doubt and you have a lifeline in place, frogging is safe. If you have no lifeline and the yarn is delicate, tink.
How do I stop losing stitches off the end of the needle?+
Use needle stoppers or small rubber caps on the ends of straight needles, and choose needles with slightly less slippery tips. Many edge losses also come from leaving work mid-row; finish the row before you put the project down. If you must stop, place a locking marker through the last worked stitch so it cannot run.
What is the difference between a lifeline and a stitch holder?+
A lifeline is waste yarn threaded through a row of stitches while they are still on the needle, acting as a safety floor if you need to rip back. A stitch holder physically holds live stitches that have been taken off the needle, such as a sleeve head or a pocket opening. Both prevent unravelling, but they serve different moments in a project.
Can you fix mistakes in mohair or fuzzy yarn?+
Only gently, and only early. Fibres with a strong halo grip each other and felt together when disturbed repeatedly. If you spot a mistake in mohair within a row or two, tink back carefully. Anything deeper is a serious decision, because ripping back may damage the yarn permanently. Prevention and frequent counting matter more with these yarns than with any others.
How do I fix a mistake in the middle of a colourwork chart?+
For a single wrong-colour stitch, duplicate stitch over it afterwards — it is far less work than un-knitting a whole row. For a pattern error affecting several stitches, tink back to the start of the chart row and re-work it, because colourwork repeats are position-dependent. Always place markers at the repeat boundaries so an error stays contained.
Why does my knitting look holey where I picked up a dropped stitch?+
Usually because the rescued stitch was left slightly loose, or because it was re-seated in the wrong orientation and now sits twisted. Gently tug the neighbouring stitches to redistribute the slack, and check that the right leg of the loop sits at the front of the needle. Blocking will settle the rest.
Is it worth fixing mistakes in a beginner project?+
Yes — but selectively. Fixing mistakes is itself a core skill, and a simple project is the safest place to practise it. Fix structural errors such as wrong stitch counts and dropped stitches. Consider leaving small tension irregularities, because the confidence you gain from finishing matters more than a flawless first scarf.
How often should I place a lifeline?+
Before every complex section, and roughly every ten to fifteen rows in long pieces of lace or charted work. If you are working with an interchangeable needle set that threads lifelines automatically, you can afford to place them even more often. The cost is a few minutes; the benefit is that no mistake ever costs you more than one section.
Final Word: Mistakes Are the Tuition, Not the Failure
Every knitter you admire has a drawer of finished objects containing repairs nobody else can see. That is not a compromise — it is how the craft is actually practised. The skill is not avoiding mistakes forever. It is recognising them early, understanding what the fabric is telling you, and choosing the repair that costs you the least time and the least frustration.
You now have the full system: read the fabric and count before you touch anything; keep a crochet hook, tapestry needle, and locking markers within reach; rescue dropped stitches with a ladder and a hook; even out tension without un-knitting; tink close mistakes and frog distant ones behind a lifeline; correct twisted stitches, mis-crossed cables, and colourwork slips; fix edges properly; and build habits that keep errors small and shallow.
The last part is up to practice. Do the next row calmly. Count at the end of it. Place a lifeline before the next complicated section. And when something goes wrong anyway — because it will — take a breath and look at the loops instead of the disaster. The answer is usually right there in the stitches.