
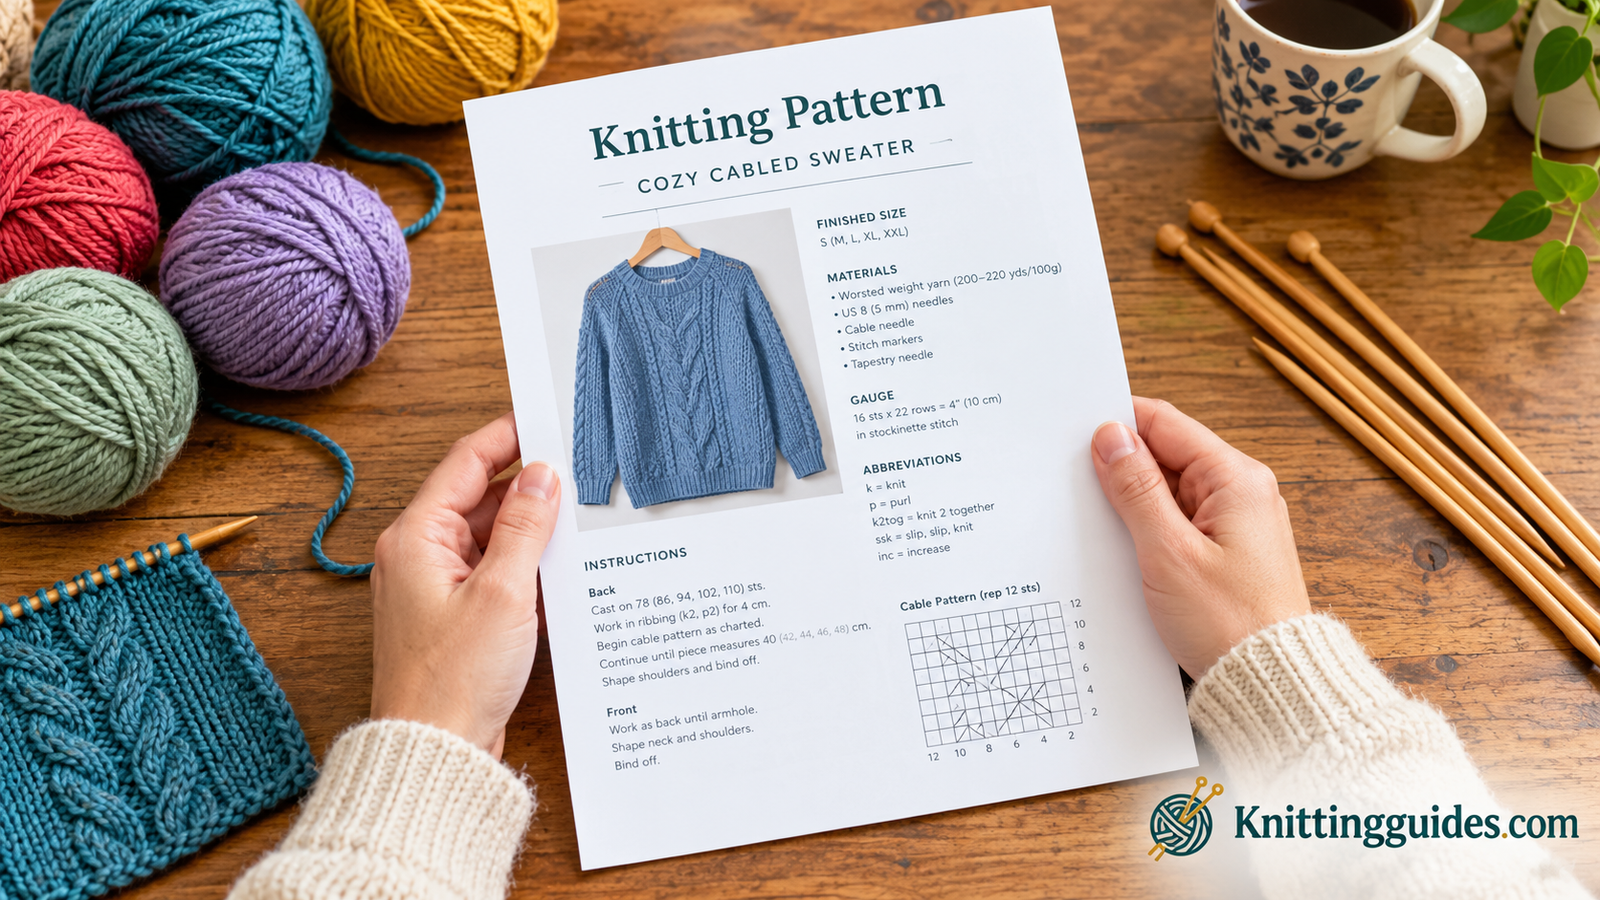
How to Read a Knitting Pattern
A plain-English walkthrough of every line, symbol and abbreviation you will ever meet — so the pattern stops feeling like a secret code and starts feeling like a recipe you can actually cook from.
The first time most knitters open a real pattern, they feel two things at once: excitement and mild panic. There are asterisks, brackets, parentheses, abbreviations that look like typos, and numbers that seem to arrive from nowhere. It is tempting to abandon the page and just start knitting whatever looks right.
Here is the good news. A knitting pattern is not a riddle. It is a technical document with a very consistent grammar, and once you understand that grammar you can read almost any pattern in the world — a free blog download, a printed magazine chart, a designer PDF, or a vintage booklet from a charity shop.
Reading patterns is also the fastest route from “I can knit a scarf” to “I can knit anything.” If you are still building confidence, start with our guide to how to start knitting, then come back here. If you already know the knit and purl stitches and you have finished your first project — maybe your first scarf — you are exactly the reader this guide is written for.
Over the next twelve steps, we will walk through a pattern page from top to bottom. We will translate the abbreviations, explain why gauge is not optional, show you how written instructions and charts differ, and give you a repeatable workflow for following a pattern without losing your place. By the end, you should be able to look at a page of instructions and know instantly what to do first.
One more thing before we begin: reading a pattern is a skill that sits alongside choosing the right tools. If your needles are fighting you, no amount of careful reading will save the project. It is worth having a look at the best knitting needles for beginners so the physical act of knitting stays out of the way of the mental act of following instructions.
Ready to practise? Pick up a beginner-friendly pattern book and a set of needles so you can follow along with a real page in front of you.
Check Price on Amazon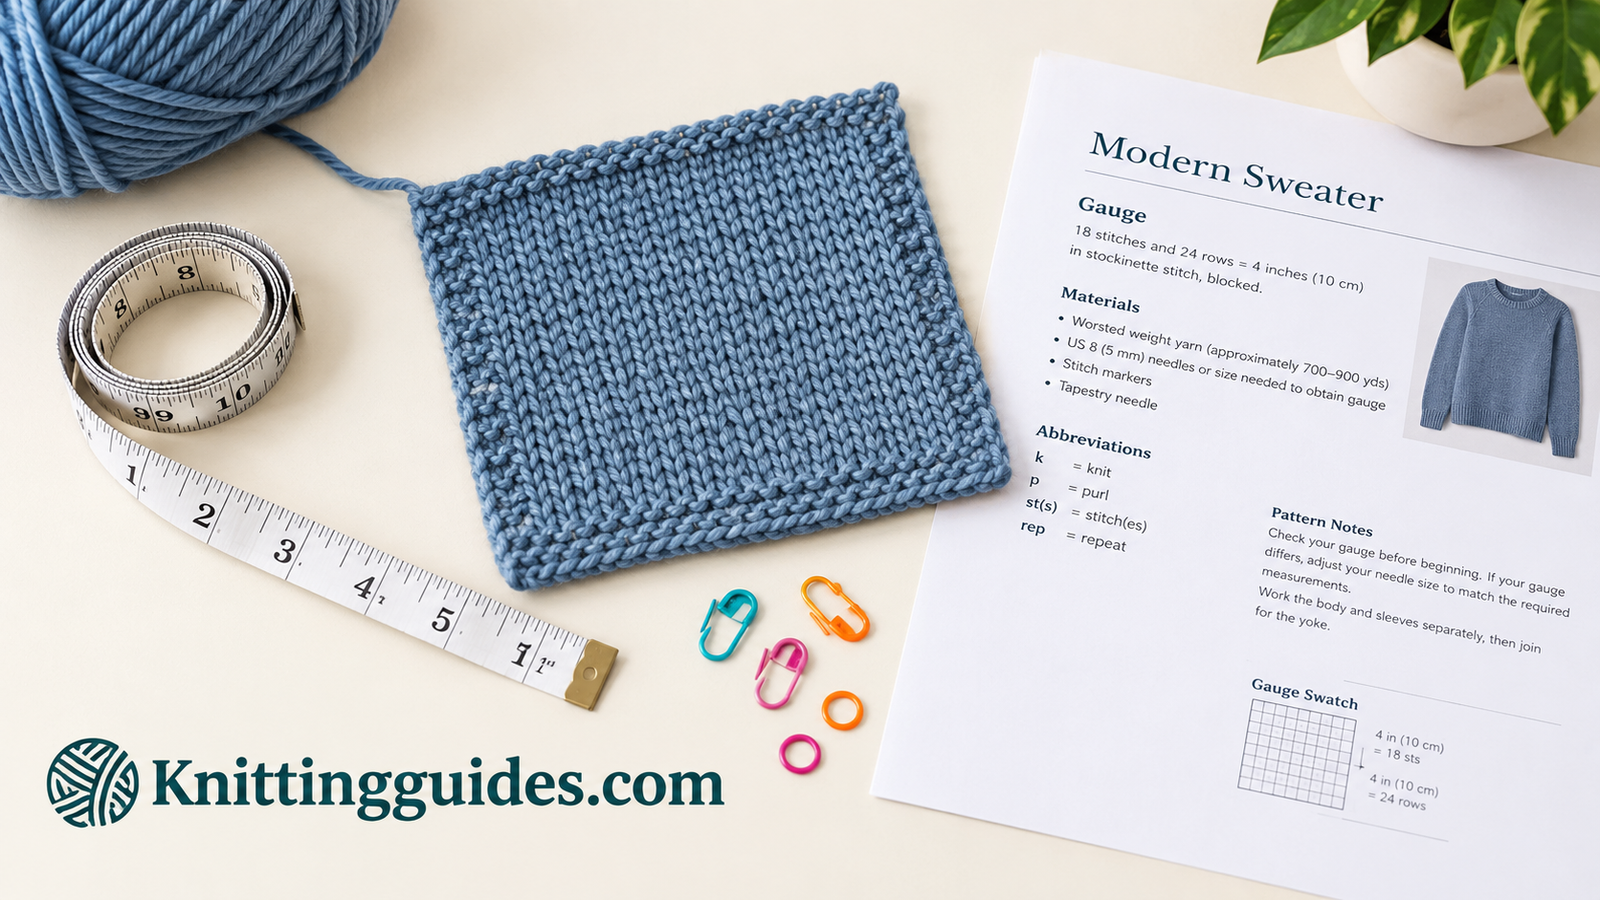
A pattern, a swatch and a tape measure: the three objects that quietly decide whether a project turns out the size you expected.
WatchReading a Knitting Pattern, Step by Step
Sometimes it is easier to see someone’s hands move across a real pattern page than to read about it. The walkthrough below shows the front matter, the abbreviations and the first few rows being worked, so you can watch the translation happen in real time.
Takeaway: notice how the pattern is read aloud — abbreviation, then number, then action. That rhythm is the same in every pattern you will ever open.
Follow along with your own page. A row counter and a pack of stitch markers make it far easier to keep your place while you learn.
Check Price on AmazonStep 1Get the Big Picture: Anatomy of a Knitting Pattern Page
Before you read a single instruction, spend two minutes learning how a pattern page is laid out. Almost every designer in the world uses the same skeleton, whether the pattern is a one-page blog post or a forty-page garment collection. Once you know where things live, your eye stops wandering and starts hunting for the information you actually need.
A well-built pattern runs top to bottom in a predictable order: a title and photograph, a short description, the skill level, the finished measurements, the sizes included, the materials list, the gauge, any special notes about construction, the abbreviations, the instructions themselves, and finally the finishing. Some designers put the abbreviations at the end instead of the middle. Some fold the gauge into the materials list. But the ingredients are nearly always the same.
Read the page in this order every single time. It takes two minutes and saves hours of confusion later.
The five pieces of front matter that matter most
- Finished measurements. These are the dimensions of the object or garment once it is knitted and blocked — not your body measurements. Confusing the two is the single most common sizing mistake knitters make.
- Yarn. Look for the yarn weight category, the fibre content, the total length required and the number of balls or skeins. Note that different brands put different amounts of yarn in a ball.
- Needles and notions. Patterns list the main needle size first, then any secondary sizes used for ribbing or edging, followed by stitch markers, cable needles, tapestry needles and buttons.
- Gauge. The number of stitches and rows that should fit into a stated measurement, worked in a specific stitch and measured after a specific treatment, usually blocking.
- Pattern notes. This small block often contains crucial information: whether the garment is worked flat or in the round, whether charts are included, whether the pattern is written for a particular construction, and any designer quirks worth knowing before you cast on.
Why reading the whole pattern first is not optional
Novice knitters tend to read one row at a time. Experienced knitters read the entire pattern before they wind a single ball of yarn. The reason is simple: patterns contain surprises. There might be a long stretch of plain knitting in the middle, a sudden shift to a chart, a section worked back and forth on circular needles, or a finishing step that requires a tool you do not own. If you discover that halfway through, you either stop or you improvise — and improvising is where projects go wrong.
Reading the whole pattern first also tells you the shape of the project. You learn whether it starts at the hem and grows upward, whether it is worked in pieces, and where the difficult sections sit. That knowledge lets you plan: swatch on a quiet evening, tackle the lace section when you can concentrate, and save the seaming for daylight.
If you are choosing your very first project, a pattern with a written tutorial and lots of photographs is worth its weight in gold. Our roundup of beginner knitting kits includes sets that come with a pattern, the right yarn and the right needles all matched together, which removes the guesswork entirely.
Build your pattern library. A well-edited pattern book teaches you to recognise the layout instantly, project after project.
Check Price on AmazonStep 2Read the Skill Level — and Know What It Really Means
Somewhere near the top of the pattern you will find a label: beginner, easy, intermediate, advanced. These labels are useful, but they are not standardised. One designer’s “easy” is another designer’s “brave beginner.” The trick is to read past the label and look at the techniques listed in the pattern instead.
A pattern is only as difficult as its hardest technique and its most complicated shaping. A sweater with beautiful cables might actually be easier than a plain stockinette sweater, because cables are memorised quickly while garment shaping requires constant attention to stitch counts.
A simple hat with colourwork can be harder than a plain sweater. Read the technique list, not the badge.
What each label usually assumes
| Label | Assumed skills | Typical techniques | Watch out for |
|---|---|---|---|
| Beginner | Cast on, knit, purl, cast off | Simple texture, straight edges, minimal shaping | Long sections that can feel repetitive; few photos |
| Easy | Reading written instructions confidently | Ribbing, basic increases and decreases, seaming | Shaping phrases such as “dec 1 st each end every 4th row” |
| Intermediate | Comfortable with stitch counts and repeats | Cables, lace, colourwork, working in the round | Charts, pattern repeats across large stitch counts |
| Advanced | Confident with garment construction | Short rows, complex shaping, unusual construction | Minimal hand-holding; assumptions about prior knowledge |
How to judge a pattern honestly
- List the techniques. Scan the abbreviations. If you see three or four terms you do not know, that is a genuine learning project — wonderful, but plan extra time.
- Count the shaping. Patterns with lots of “every 4th row” instructions require constant counting. If you dislike counting, choose something with long plain sections.
- Check the construction. A flat, seamed garment is often more forgiving than a top-down in-the-round one, because you can pin the pieces together and adjust before sewing.
- Look at the support. Patterns with tutorials, videos, or a designer who answers questions are worth choosing while you are still building pattern-reading confidence.
It is also worth understanding the wider craft landscape at this point. Knitting patterns read differently from crochet patterns, and if you have come to knitting from crochet you will notice the terminology shift. We compare the two directly in crochet vs knitting: which is easier, including how the written instructions differ.
Match the pattern to your needles. Beginner-friendly needle sets take one variable out of the equation while you learn to read instructions.
Check Price on AmazonStep 3Decode the Abbreviations and Glossary
Abbreviations exist to keep instructions short enough to fit on a page. They are not there to exclude you. Every pattern worth using includes an abbreviation key, and if it does not, the terms are almost always standard US or standard UK terms. Your job is to identify which convention the pattern uses before you begin.
Here is the important distinction: US and UK knitting terms differ. A US knitter’s “bind off” is a UK knitter’s “cast off.” More dangerously, crochet terms differ far more dramatically between the two systems, and some older patterns mix conventions. When in doubt, look for the word “gauge” (US) versus “tension” (UK), or check the designer’s stated location.
Abbreviations are compressed instructions: number first, action second. “K2, p2” means knit two, purl two.
The abbreviations you will meet most often
| Abbreviation | Meaning | What it looks like |
|---|---|---|
| k / p | Knit / purl one stitch | The two building blocks of every knitted fabric |
| st(s) | Stitch or stitches | Appears in counts: “k to last 3 sts” |
| RS / WS | Right side / wrong side | The public face and the inside of the fabric |
| CO / BO | Cast on / bind off (cast off in UK usage) | Creating stitches at the start and closing them at the end |
| rep | Repeat | Tells you to run a sequence again |
| k2tog | Knit two together | A right-leaning decrease |
| ssk | Slip, slip, knit | A left-leaning decrease |
| yo | Yarn over | An intentional hole and an extra stitch, used in lace |
| M1L / M1R | Make one left / make one right | Invisible increases with a chosen lean |
| kfb | Knit into front and back | An easy increase that leaves a small bump |
| pm / sm | Place marker / slip marker | Keeps repeats and shaping lines visible |
| sl | Slip a stitch purlwise | Moves a stitch without working it |
| tbl | Through the back loop | Twists the stitch for texture or firmness |
| work even | Continue without shaping | Keep the stitch count the same |
| beg / cont | Begin / continue | Signals the start of a new instruction block |
Build your own reference card
The fastest way to internalise abbreviations is to write them out once, in your own words, on an index card and keep it clipped to the pattern. Within two or three projects, you will stop referring to it. Many knitters also keep a stitch dictionary beside them, which turns any unfamiliar abbreviation into a photograph and a short explanation.
Stitch dictionaries are also where you will learn how pattern stitches are named and described, which makes unfamiliar instructions feel much less alarming. If you are also working out which needles suit which abbreviations — lace patterns, for instance, demand sharper tips — our guide to what size knitting needles for beginners explains how needle choice interacts with the stitches you are working.
Keep a stitch dictionary nearby. It turns every unfamiliar abbreviation into a picture and a two-line explanation.
Check Price on AmazonStep 4Work Out the Materials List and Substitute Yarn Wisely
The materials list is a shopping list and a specification sheet at the same time. Read it properly and you will buy exactly what you need; skim it and you may end up with a beautiful yarn that produces a fabric the pattern never intended.
Start with the yarn. Patterns name a specific yarn because that is what the designer used and swatched with, but you are rarely obliged to use it. What you must match is the category: the weight class, the fibre behaviour and the approximate length per ball. Substituting successfully is a small, learnable skill, and once you have it the entire world of yarn opens up.
Think of yarn weight as the thickness of the strand. Needle size follows it, and gauge confirms you got it right.
Yarn weight categories at a glance
The ranges below are general industry conventions rather than product specifications, and they exist to help you match a substitute yarn to a pattern. Always swatch, because fibre content changes everything.
| Category | Common names | Typical stitch count per 10 cm / 4 in | Typical needle range |
|---|---|---|---|
| Lace | Cobweb, lace | Very high — often 30 or more | Very fine, roughly 1.5 to 2.5 mm |
| Super fine | Sock, fingering | High, around 27 to 32 | Roughly 2.25 to 3.25 mm |
| Fine | Sport, baby | Around 23 to 26 | Roughly 3.25 to 3.75 mm |
| Light | DK, light worsted | Around 21 to 24 | Roughly 3.75 to 4.5 mm |
| Medium | Worsted, aran, afghan | Around 16 to 20 | Roughly 4.5 to 5.5 mm |
| Bulky | Chunky, craft | Around 12 to 15 | Roughly 5.5 to 8 mm |
| Super bulky | Roving, super chunky | Around 7 to 11 | Roughly 8 mm and above |
| Jumbo | Jumbo, arm knitting | Under 7 | Very large needles or tools |
How to substitute yarn without regret
- Match the category first. If the pattern asks for a light weight yarn, choose another light weight yarn. Fibre and colour come second.
- Compare length, not just ball count. Patterns say how much total yarn is needed. Divide that by the length in your chosen ball to work out how many to buy, then add a little extra for swatching and finishing.
- Think about fibre behaviour. Superwash wool grows when blocked. Cotton and linen have almost no bounce. Alpaca drapes. Mohair blooms and blurs stitch definition. Choose based on the fabric you want.
- Buy one dye lot. Even in the same colourway, different dye lots can shift noticeably. Buy it all at once, and keep the labels until the project is finished.
- Swatch the substitute, not the original. The pattern’s gauge was measured with the designer’s yarn. Yours may behave differently, and the swatch is where you find out.
The rest of the materials list
Beyond yarn, the list tells you the needle sizes and types, any notions, and finishing supplies. Straight needles suit flat pieces; circular needles handle both flat and in-the-round work and are kinder to the wrists on heavy projects. If you are deciding between them, our comparison of circular versus straight knitting needles walks through the practical differences.
Interchangeable needle sets are the long-game answer for knitters who work through many patterns, since a single set covers most of the sizes a pattern might request. We compare several options in our guide to the best interchangeable knitting needle sets. And if you love fibre from the very beginning of the process, our look at the best spinning wheels for beginners covers making your own yarn for the patterns you read.
Stock up on the basics. A well-matched yarn and needle pairing makes following a pattern dramatically easier.
Check Price on AmazonStep 5Understand Gauge, and Never Skip the Swatch
Gauge is the paragraph knitters read least and regret most. It looks like a small technical note. In reality it is the single instruction that determines whether your finished item is the size the pattern promises.
Here is what a gauge line actually says: in this specific stitch, blocked, this many stitches fit across a stated measurement, and this many rows fit down the same measurement. Every word counts. If the pattern says the gauge is measured in stockinette after blocking, and you measure in ribbing before blocking, you will get a different number and a different outcome.
Measure in the middle of the swatch, away from the edges, and count over the largest square you can.
Why gauge changes the size of everything
Knitted fabric is elastic and dense, so a small difference in tension multiplies across hundreds of stitches. If a pattern expects a certain stitch count across the chest and you are knitting more stitches per centimetre than that, the garment will be narrower than intended. Fewer stitches per centimetre and it will be wider. Over a full sweater, a tiny shift becomes centimetres.
This is also why patterns ask you to knit a swatch larger than the measurement — typically around 15 cm square — and to block it the way you will treat the finished item. Edge stitches distort the count, so a bigger swatch gives a truer answer.
How to swatch properly
- Use the pattern’s needle size and the pattern’s stitch. If the gauge is given in stockinette, knit stockinette. If it is given in pattern stitch, work the pattern stitch.
- Add a border. A few stitches of garter or seed stitch at the edges stops the swatch curling and makes it easier to measure.
- Block it. Wash and lay flat, or steam, exactly as you plan to treat the finished object. Then measure.
- Count honestly. Lay the swatch flat, use a ruler or a gauge tool, and count the stitches and rows inside the marked area.
- Adjust the needle. Change size until you match. Write down the size that worked — you will need it later.
Stitch gauge versus row gauge
Stitch gauge controls width and row gauge controls height. Most knitters match stitch gauge more easily than row gauge, and many designers say so explicitly. If your row gauge is different, the piece may be taller or shorter than expected, which matters in garments with armhole shaping. When the pattern tells you to work to a certain measurement rather than a certain number of rows, that is the designer giving you a way out of a row-gauge mismatch.
Gauge is also one of the main reasons a project grows unexpectedly after washing. Our guide to how to start knitting covers early tension habits that make matching gauge much easier from the beginning.
Measure like a professional. A dedicated gauge ruler or measuring square removes the guesswork from swatching.
Check Price on AmazonStep 6Read the Written Instructions, Row by Row
Now we reach the heart of the pattern. Written instructions are simply a sequence of actions, in order, one row at a time. The skill is not in decoding individual terms — you have already done that — but in reading a whole row ahead, understanding where you are, and keeping an accurate count.
Rows are usually numbered and often labelled with the side of the fabric you are facing. “Row 1 (RS)” tells you two things: it is the first row of the repeat, and it is the right side of the work. In most flat knitting, odd rows are right side and even rows are wrong side, but circular knitting behaves differently because you are always looking at the outside.
Read an entire row before you work it. Then read it again while knitting, one instruction at a time.
The read-then-knit rhythm
- Read the whole row once without needles in your hands. Notice where the repeats sit and where the edge stitches are.
- Set your markers before you start. If the row contains a repeat, place a marker at each end of the repeat so you can see it at a glance.
- Work one instruction at a time, saying it quietly to yourself. “Knit four. Purl two. Knit two.” The rhythm is surprisingly helpful.
- Check the stitch count if the pattern gives one. Many patterns state the number of stitches you should have at the end of a shaping row. Use it.
- Mark your place. A magnetic row counter, a sticky note on the page, or a simple tally on paper prevents the classic “which row was I on?” problem.
Keeping your place on the page
Physical tracking beats mental tracking every time. Popular methods include a highlighter for the row you are on, a sticky note placed under the line, a magnetic board with a sliding rule, or a row counter clipped to the work. Any of them works. The point is to remove the need to remember, so your attention stays on the stitches.
Row 2 (WS): P1, *k1, p1; rep from * to end.
Rep Rows 1-2 for seed stitch until piece measures 20 cm, ending with a WS row. — 84 sts
In that example, the final figure is the stitch count the designer expects at the end of the section. It is a built-in error check, and experienced knitters treat it as mandatory rather than optional.
Common written-instruction phrases
| Phrase | What it means | What to do |
|---|---|---|
| “Work as established” | Continue the pattern as it is already set up | Keep the same stitch pattern running without changes |
| “Work even” | Keep the stitch count constant | No increases or decreases until the next instruction |
| “At the same time” | Two shaping actions overlap | Track both sets of instructions simultaneously — mark them separately |
| “Ending with a WS row” | Stop at a specific point in the sequence | Check which row you finished on before moving to the next section |
| “Place marker” | Insert a stitch marker at that point | Slip it on every subsequent row to keep the boundary visible |
| “Keeping pattern correct” | Shaping happens inside a textured stitch pattern | Continue the stitch pattern while adding or removing stitches at the edges |
When a row contains a mistake, resist the urge to unravel the entire project. Most errors can be fixed without dropping everything, and our guide to how to fix mistakes in knitting covers tinking, laddering down and lifelines in detail.
Never lose your row again. A row counter and a set of locking stitch markers make pattern-following far calmer.
Check Price on AmazonStep 7Follow the Charts — and Understand Why They Exist
Charts terrify beginners and then, at some point, become most knitters’ preferred way to read. A chart is a grid where each square represents one stitch, and each symbol represents one action. Once the grid makes sense, you can see the shape of the fabric at a glance, which written instructions simply cannot show.
Charts are used for lace, cables, colourwork and textured stitch patterns. The key to reading them is knowing the direction: on right side rows you read from right to left, on wrong side rows from left to right, and always from the bottom of the chart upward. When knitting in the round, every row is a right side row, so every row reads right to left.
Every square is one stitch. Follow the arrows and the chart turns into a map of your fabric.
Charts versus written instructions
| Feature | Written instructions | Charts |
|---|---|---|
| Best for | Shaping, garments, complex sequences | Lace, cables, colourwork, texture |
| Strength | Unambiguous, works well for counting | Shows the shape of the fabric visually |
| Weakness | Hard to picture the finished fabric | Requires knowing symbol keys and reading direction |
| Accessibility | Easy for screen readers and translation | Harder without a text alternative |
| Mistake spotting | Requires recounting stitches | Errors are visible as a break in the pattern |
| Learning curve | Gentle | Steeper at first, then faster |
Chart details that trip people up
- The key is the law. Symbols are not standardised across designers. Always read the chart key before you begin, even if you have seen the symbol before.
- No-stitch boxes. Shaded or greyed squares in shaping charts represent places where a stitch does not exist yet or any more. Skip them entirely.
- Only charted stitches are shown. A pattern may say the chart covers a repeat of twelve stitches while the row contains eighty-four. That means you work the chart seven times.
- Wrong side rows vary. Some charts show every row; others show only right side rows and tell you to “work wrong side rows as they appear.”
- Charts in the round read differently. Because you always face the outside of the work, every row is read right to left.
See every symbol clearly. A craft light with adjustable brightness makes chart reading far more comfortable.
Check Price on AmazonStep 8Untangle Repeats, Brackets, Asterisks and Parentheses
This is where most pattern confusion lives. A single row might read like this: “K3, *p2, (k1, yo, k1) in next st, p2; rep from * 4 more times, k3.” To a beginner it looks like mathematics. To an experienced knitter it is a sentence with clearly marked clauses.
Pattern punctuation has a strict hierarchy. Once you know the hierarchy, you can decode any nested instruction without hesitation. Each symbol tells you how many times to do something and where the repeated section begins and ends.
Break the row into clauses and each symbol becomes obvious: edge stitches, repeat block, inner cluster.
The hierarchy, from smallest to largest
- Parentheses
( ). Actions grouped together, usually worked into the same stitch or the same small group. “(K1, yo, k1) in next st” turns one stitch into three. - Brackets
[ ]. A cluster of stitches worked as a unit, sometimes repeated a stated number of times. In some patterns brackets also indicate sizes. - Asterisks
* ... *. The block of instructions you repeat. The pattern tells you how many times: “rep from * to * 6 times.” - Square brackets for sizes. When a pattern covers multiple sizes, numbers appear in brackets or parentheses in size order. We cover this fully in Step 10.
Reading “repeat” language precisely
| Instruction | How many repeats? | Common misreading |
|---|---|---|
| “Rep from * to * 4 times” | Four repeats of the block | Doing it three times and stopping early |
| “Rep from * 4 more times” | Five repeats in total | Doing it four times in total |
| “Rep last 2 rows 3 times” | Three more sets of the two rows | Working only three extra rows instead of six |
| “Rep Rows 1-4 for pattern” | Run the four-row sequence continuously | Losing track of where the repeat starts |
| “Work 3 reps across the row” | Three full blocks fit across the stitches | Forgetting the edge stitches outside the repeats |
Marking repeats physically
The simplest technique for repeat-heavy rows is to place a stitch marker at the start of every repeat before you work the row. Then you never count the whole row — you simply work to the marker, run the block again, and check that the markers are still where they belong. This single habit eliminates the majority of pattern-reading errors in textured and lace work.
Repeats are also where many knitters discover the value of lifelines — a length of scrap yarn threaded through a row so you can rip back safely. That technique is explained in how to fix mistakes in knitting, and it pairs beautifully with the marker habit described above.
Mark every repeat. A mixed pack of ring and locking stitch markers covers repeats, shaping lines and button bands.
Check Price on AmazonStep 9Shape with Confidence: Increases, Decreases and Stitch Counts
Shaping is the part of a pattern where the numbers start moving. Sleeves widen, necklines dip, hat crowns narrow. Written shaping instructions are compressed and can look alarming, but they always follow the same structure: what to do, where to do it, and how often.
Learn to unpack one shaping sentence and you can unpack them all. Take “dec 1 st each end of next row, then every 4th row 5 times.” It means: decrease at both ends of the very next row, then decrease at both ends every fourth row, five more times. That is six decrease rows in total.
Shaping sentences always contain three facts: what to do, where to do it, and how often.
Decoding shaping instructions
| Pattern says | What happens | Stitch count changes |
|---|---|---|
| “Dec 1 st each end of next row” | One decrease at the start and one at the end of a single row | Minus two stitches, once |
| “Dec 1 st each end every 4th row 5 times” | Decrease on every fourth row, five times | Minus ten stitches in total |
| “Inc 1 st at each end of next row, then every 6th row 3 times” | Increase immediately, then three more increase rows | Plus eight stitches in total |
| “Cast off 4 sts at beg of next 2 rows” | Bind off four stitches at the start of each of the next two rows | Minus eight stitches |
| “Shape raglan: dec 2 sts each side every RS row” | Two decreases on each side of every right side row | Minus four stitches per right side row |
Increases and decreases compared
- k2tog leans right and is quick. ssk leans left and mirrors it. Use them as a pair for symmetrical shaping.
- M1L and M1R are near-invisible increases that lift the strand between stitches. They leave a tiny eyelet if worked loosely.
- kfb is the easiest increase but adds a visible bump, so it is best in textured or ribbed fabric.
- Yarn overs create a deliberate hole. In lace that is the point; in a plain garment it is usually a mistake unless the pattern asks for it.
Keeping an accurate count
Count after every shaping row. It takes fifteen seconds and it is the difference between a fixable error and a reknitted sleeve. Many knitters write the expected count in the margin of the pattern as they go, building a running record of the piece.
Shaping is also where construction choices matter. If you are working sleeves or bodies in the round rather than flat, our guide to how to knit in the round for beginners explains how shaping phrases change when there is no wrong side row.
Track every shaping row. A simple row counter clipped to the work keeps complex shaping under control.
Check Price on AmazonStep 10Choose Your Size and Read the Schematic
Garment patterns usually offer several sizes, and the instructions contain the numbers for all of them at once. Numbers appear in brackets, parentheses or bold text in size order, and you pick out the one that applies to you. Selecting and tracking your size is a skill in itself, and it is worth learning carefully before you knit anything that has to fit.
Before you choose, understand ease. Ease is the difference between your body measurement and the finished garment measurement. Positive ease means the garment is larger than you are and drapes loosely. Negative ease means it is smaller and fits snugly, which only works with stretchy fabric. Designers usually state how much ease the sample has, and that is the best guide to how the design is meant to sit.
The schematic shows the finished measurements. Compare them to your body plus the ease you want.
How multiple sizes appear in the text
Work in ribbing for (6, 6, 8, 8) cm.
Change to larger needles and work in pattern, shaping as follows: dec 1 st each end every (8, 8, 10, 10)th row (4, 5, 5, 6) times.
The numbers are listed in size order. Your job is to read only the position that matches your chosen size. The most reliable method is to photocopy or print the pattern and highlight every number belonging to your size before you cast on. It sounds like overkill. It is not.
Choosing the right size
- Start from the schematic, not the size label. Size labels vary between designers and countries. The finished measurements do not.
- Decide your ease. Look at the sample photographs and read the stated ease. If the designer says the sample is shown with positive ease, that tells you how the garment is meant to fit.
- Check the upper arm and hip. Patterns usually list several measurements. If one of them does not work for you, consider grading between sizes, which means adjusting stitch counts partway through.
- Use length instructions where offered. Many patterns give a measurement to work to rather than a fixed number of rows, which lets you customise length easily.
Reading the schematic properly
A schematic is a flat line drawing of the finished pieces with measurements marked. It shows the shape of the pieces, where the armholes begin, how the neckline is shaped, and how long the sleeves are. Read it alongside the written instructions and the two will confirm each other. If they disagree, the written instructions are usually the working document, but it is worth contacting the designer.
Measure accurately. A soft tape measure is essential for choosing sizes and checking finished dimensions.
Check Price on AmazonStep 11Read the Finishing Instructions — Where Projects Are Won
Finishing is the section knitters skip and then regret. It contains the instructions that turn a pile of knitted pieces into a polished object: blocking, seaming, picking up stitches for a neckband, adding buttonholes, and weaving in ends. The order matters, and the pattern tells you the order for a reason.
Read the finishing section before you knit anything. If it requires a tapestry needle, blocking mats or spare buttons, you want to know that now rather than at midnight before a deadline.
Mattress stitch joins pieces invisibly from the right side, provided both edges are blocked to the same measurements first.
The finishing sequence that most patterns follow
- Weave in ends on each piece before assembly, so loose ends do not get trapped in seams.
- Block the pieces. Wet blocking suits most animal fibres; steam suits many plant fibres. Follow the yarn label and the pattern.
- Check measurements. Confirm the pieces match the schematic before seaming. Adjust now, while adjustments are cheap.
- Seam using the method the pattern suggests, usually mattress stitch for vertical seams and backstitch or whip stitch for shoulders.
- Pick up stitches for bands and necklines, using the ratio the pattern gives.
- Add buttonholes and buttons, then block once more to settle everything into place.
Finishing terms you will meet
| Term | Meaning | Why it matters |
|---|---|---|
| Blocking | Wetting or steaming the fabric and pinning it to shape | Evens out stitches and sets the final measurements |
| Pick up and knit | Lifting loops along an edge and working new stitches | Creates clean bands and necklines |
| Provisional cast on | A temporary cast-on you later remove | Used when live stitches are needed at the other end |
| Three-needle bind off | Closing two live edges together | A strong, tidy shoulder seam |
| Weave in ends | Hiding yarn tails inside the fabric | Prevents unravelling and looks professional |
| Grafting / Kitchener stitch | Joining two sets of live stitches invisibly | Used at toes, shoulders and hems |
Finishing is also where your cast-on and bind-off choices show. If the pattern specifies a stretchy cast-on for a cuff, there is a reason. Our guides to how to cast on knitting and how to cast off knitting cover the main methods and when each one belongs in a project.
Finish like a professional. Blocking mats and a set of tapestry needles make seaming and setting far easier.
Check Price on AmazonStep 12Troubleshoot, Adapt and Build Your Own Workflow
By this point you can read a pattern. The final step is turning that knowledge into a repeatable process, and understanding what to do when the pattern is unclear, the numbers do not add up, or you simply want to change something.
Patterns are written by humans, and even excellent ones can contain typos. Knowing how to spot a genuine error — rather than assuming you have misunderstood — is part of pattern literacy. The test is always arithmetic and symmetry. If a stitch count does not divide by the repeat, or if one side of a garment says to decrease five times and the other says six, something is wrong on the page.
A four-stage loop you can apply to every project, from a dishcloth to a tailored cardigan.
Follow the pattern exactly, or adapt? A honest look
| Approach | Pros | Cons |
|---|---|---|
| Follow the pattern exactly | Results match the sample; errors are easier to identify; great for learning construction | Less creative freedom; you may not love the fit or length |
| Adapt length and ease | Better fit; a garment that suits your proportions | Requires understanding shaping; measurements must be recalculated |
| Substitute yarn | Wider choice of colour, fibre and budget | Gauge and drape change; swatching becomes essential |
| Change the stitch pattern | Truly custom results; keeps projects interesting | Row gauges and stitch counts shift; more planning required |
When something goes wrong
- Stitch count is off. Count again before ripping. If it is genuinely wrong, ladder down to the mistake and rebuild that stitch column.
- The fabric does not look like the photograph. Check that you are on the right side, that you are not twisting stitches, and that the chart key is being read correctly.
- The piece is the wrong size. Re-swatch. If gauge is right, check whether the pattern measures blocked or unblocked.
- An instruction is ambiguous. Look for the same technique elsewhere in the pattern, search for an errata note from the designer, or ask in a knitting community. Most designers are glad to clarify.
- You have lost your place. Count the rows from a fixed landmark, such as the last visible shaping row, and use it to reconstruct your position.
Making errors is genuinely part of building skill, and studies of craft and cognition suggest the focus involved has real value beyond the finished object. If you want the longer version, we look at the research in is knitting good for the brain. And for the practical side of undoing mistakes safely, how to fix mistakes in knitting is the companion piece to this step.
Set yourself up for smooth projects. Good tools, good light and a marker set are the quiet infrastructure of confident pattern reading.
Check Price on AmazonFAQFrequently Asked Questions About Reading Knitting Patterns
What is the first thing I should read in a knitting pattern?
Read the entire pattern from start to finish before you buy anything or cast on. Note the skill level, the finished measurements, the yarn and needle requirements, the gauge and the construction method. That overview tells you what the project demands and whether you have the tools and time for it.
How do I know if a pattern uses US or UK terminology?
Look for “gauge” (US) versus “tension” (UK), check the designer’s location in the pattern footer, and read the abbreviation key. The biggest differences appear in crochet terms rather than knitting terms, but “bind off” and “cast off” still vary between the two systems.
What do asterisks mean in a knitting pattern?
Asterisks mark the start and end of a section you repeat. If the pattern says “rep from * to * 4 times,” you work that block four times in total. If it says “4 more times,” you work it once and then repeat it four additional times, for five repeats altogether.
What is the difference between parentheses and brackets?
Parentheses usually group actions worked into the same stitch or the same small cluster, such as “(k1, yo, k1) in next st.” Brackets usually group a set of stitches or, in multi-size patterns, contain the numbers for each size. Always check the pattern’s own notes, because conventions vary slightly between designers.
Why does gauge matter so much?
Gauge determines the final size of the piece. If your stitches are denser or looser than the pattern expects, the fabric will be narrower or wider than intended. Matching gauge with a swatch is the only reliable way to guarantee the finished measurements.
Can I skip the gauge swatch?
For items where fit does not matter at all — a dishcloth or a simple blanket square — you can. For garments, hats, socks and anything sized, skipping the swatch is a gamble. The swatch takes an hour and can save a project that takes thirty.
How do I choose my size in a multi-size pattern?
Use the schematic and the finished measurements rather than the size label. Compare the finished chest or bust measurement to your own measurement plus the ease you want. Then highlight every number for your size before you begin.
What does “work even” mean?
It means continue in the established stitch pattern without increasing or decreasing. The stitch count stays the same until the next instruction tells you otherwise.
Should I use the exact yarn the pattern recommends?
Not necessarily. Match the weight category, fibre behaviour and total length, then swatch to confirm gauge. The recommended yarn is simply what the designer used and tested.
Are charts better than written instructions?
Neither is better; they suit different situations. Charts excel at lace, cables and colourwork because they show the fabric’s shape. Written instructions are clearer for shaping, counting and complex sequences. Many patterns include both, and using them together is the most reliable approach.
What should I do if the pattern seems wrong?
Check the arithmetic first. Stitch counts should divide evenly by the repeats, and symmetrical pieces should match. If the numbers genuinely do not work, look for an errata note, ask the designer, or ask an experienced knitter. Making a small note on your own copy helps you avoid the issue if you knit it again.
How long does it take to get comfortable reading patterns?
Most knitters feel confident after two or three projects. The first pattern is slow, the second is easier, and by the third the abbreviations and structure feel familiar. Reading patterns is a skill that improves very quickly with practice.
Start with an approachable pattern. A clear, well-photographed pattern book is the fastest way to build pattern-reading confidence.
Check Price on AmazonFrom Puzzled to Pattern-Confident
Reading a knitting pattern is not a talent you either have or lack. It is a set of small, learnable habits: read the page before you begin, check the skill level honestly, decode the abbreviations, match your gauge, track your size, and count your stitches after every shaping row. Do those things and the pattern stops being intimidating and starts being helpful.
What makes the difference is practice on the page itself. Choose one pattern — something simple, with written instructions and a few photographs — and work through it slowly with this guide beside you. By the second or third project, the abbreviations will read like normal language and the repeats will feel obvious.
Your next move: pick a pattern that genuinely excites you, gather the yarn and needles it asks for, swatch honestly, and commit to reading the whole thing before you cast on. If you need a starting point, our guide to how to start knitting a scarf is a forgiving first project with plenty of room to practise reading instructions.
Ready for your next project? Pick up a pattern book, a set of needles and a tape measure, and start reading with confidence.
Check Price on Amazon