
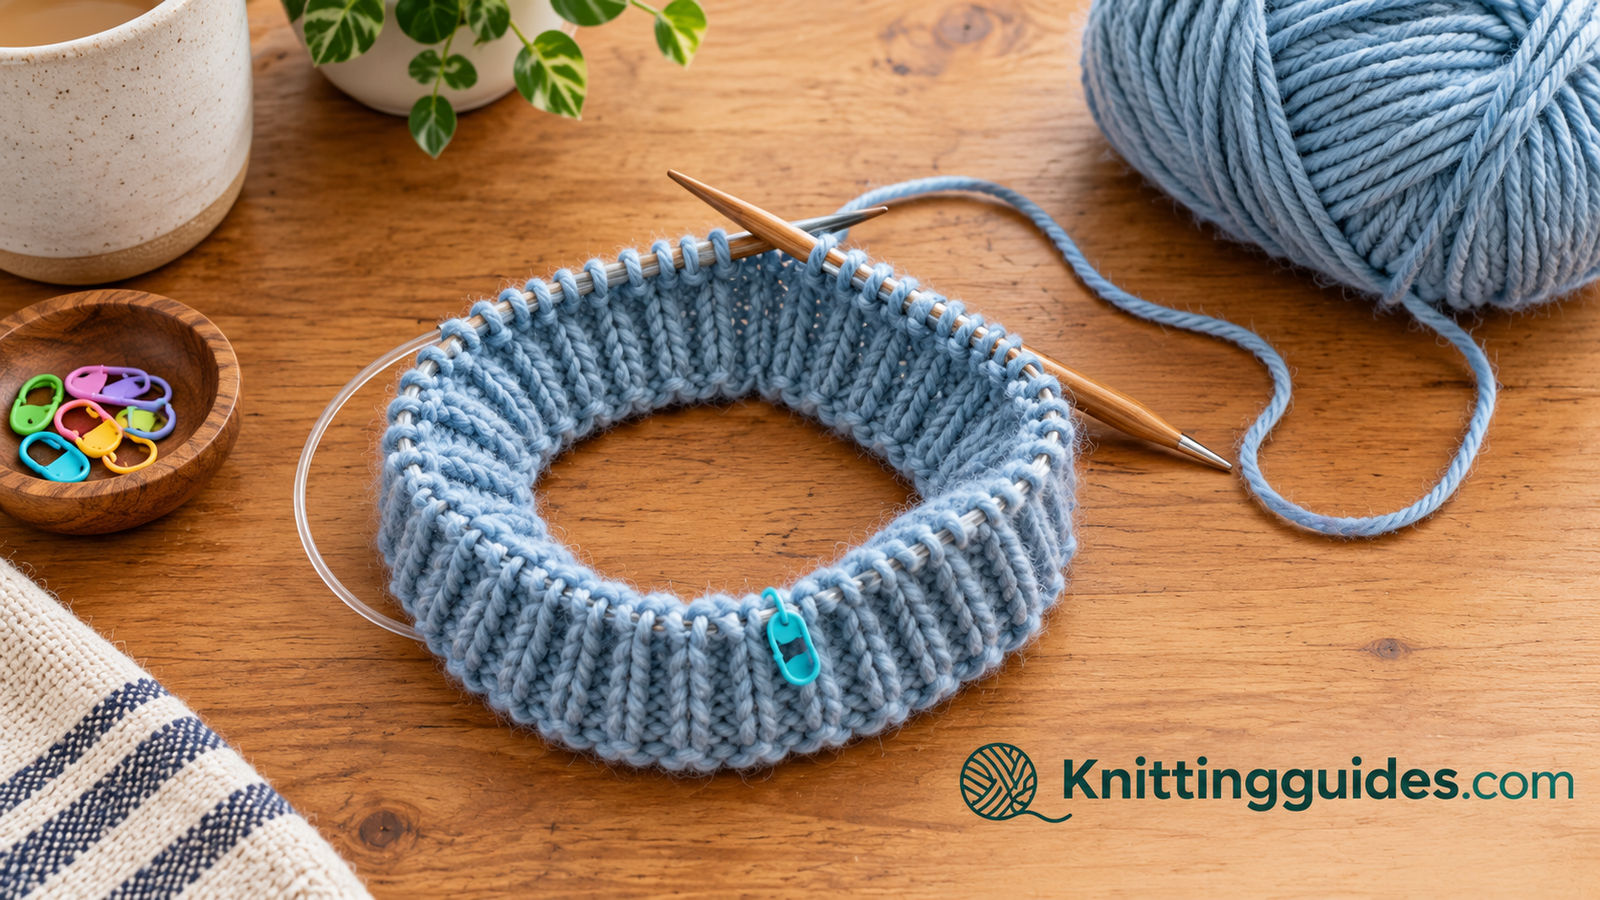
There is a moment in every knitter’s life when flat knitting stops feeling like enough. You have made a scarf, maybe two. You have seamed a rectangle to another rectangle and thought, “surely there is a better way.” There is. It is called knitting in the round, and once it clicks, a whole category of projects — hats, cowls, socks, mittens, sleeves, yokes, even entire sweaters — opens up with no side seams, no purling on the right side, and a rhythm that many people find almost meditative.
Here is the honest truth that most tutorials skip: knitting in the round is not harder than flat knitting. It is simply different for about fifteen minutes. The cast-on behaves slightly differently, the join needs a moment of attention, and the first round can feel fiddly because everything is loose and floppy and unattached to anything familiar. After that, it is the easiest knitting there is — for stockinette stitch, you literally knit every single stitch, every single round, and the fabric builds itself into a tube.
This guide is written for someone who can cast on, knit, purl, and bind off on straight needles, and who is now curious about circular knitting. We will walk through every step in order, with diagrams you can keep open beside you while you work. We will talk about the three common methods — double-pointed needles, circular needles, and magic loop — and help you pick the one that suits your hands and your project. We will cover the join in detail, because that is where beginners get stuck. And we will finish with troubleshooting, first projects, and a gentle practice plan.
If you are still building confidence with the fundamentals, it may help to read through how to cast on knitting first — the long-tail cast-on we use here assumes you already know it. And if you are wondering whether knitting or crochet is the right craft for you at all, our comparison of crochet vs knitting covers the practical differences.
What you will be able to do by the end of this guide
- Choose between circular needles, double-pointed needles, and magic loop with confidence.
- Cast on and join in the round without twisting the row.
- Work even, tidy rounds with a beginning-of-round marker and no ladders.
- Shape fabric with decreases and increases so you can knit a simple hat.
- Bind off, weave in ends, and fix the mistakes that beginners actually make.
Watch: Knitting in the Round, Step by Step
Before the written steps, it helps to see the whole process in motion once — how the cast-on sits on the cable, how the working yarn crosses to the right needle at the join, and how the marker travels up as the tube grows. Watch it once all the way through, then replay it slowly while your hands follow along.
Swap in your preferred tutorial by replacing the video ID in the embed link above.
Takeaway: notice that the knitter checks the cast-on edge before joining, and that the marker is placed on the right needle immediately after the first knit stitch. Those two habits prevent almost every early problem in circular knitting.
What “Knitting in the Round” Actually Means
Flat knitting produces a fabric that goes back and forth: you knit across a row, turn the work, and come back the other way. On the return pass you are usually purling, which is why stockinette fabric made flat has smooth “V” stitches on one side and bumpy waves on the other. Knitting in the round removes the turn entirely. Instead of a flat rectangle, you work in a continuous spiral — or, more precisely, in joined rounds — so the fabric curls into a tube as it grows.
That single change in structure has a cascade of consequences, most of them pleasant. There are no side seams to sew later. Stockinette stitch is created by knitting every round, which means no purling if you do not want to purl. Colourwork charts read exactly as they appear on the fabric, with the right side always facing you. And the finished object has a smooth, professional drape that flat-knit-and-seamed pieces rarely achieve.
Seams, spirals, and joined rounds
Strictly speaking, most circular knitting is worked in joined rounds: at the end of each circuit you slip a marker and continue, creating a closed ring of fabric. Some projects — most famously top-down hats and certain cowls — are worked in a continuous spiral with no marker and no visible starting point at all. Both are forms of knitting in the round. For a beginner, joined rounds are easier to learn because the marker gives you a clear anchor: you always know where a round begins and ends, which makes counting and following a pattern much simpler.
Think of joined rounds like a running track with a start line. You circle around, cross the line, and know exactly how many laps you have done. A spiral is more like a treadmill: it never stops, and you have to count steps instead of laps. The track is easier for your first project.
Why knitters fall in love with it
The most common reaction from knitters trying circular knitting for the first time is surprise at the speed. Stockinette in the round is pure knit stitches — no turning, no purling, no counting wrong-side rows. Many people find their tension evens out too, because every round is worked with the same hand movement rather than alternating between the two. There is a reason experienced knitters call it “autopilot knitting”: it is the kind of work you can do while watching a film or talking to a friend once the rhythm settles.
What you can make once you know how
The list is longer than most beginners expect. Hats are the classic first project because they are quick, forgiving, and teach decreasing. Cowls and infinity scarves are even easier — just a tube of ribbing or garter with no shaping at all. Socks and mittens teach small-circumference knitting and simple increases. From there you reach sleeves, yokes, and seamless sweaters, where circular knitting stops being a technique and becomes the whole construction method.
It is also worth noting what knitting in the round is not good for. Large flat panels — blanket squares, scarves worked flat, dishcloths — are usually faster on straight needles or worked flat on circulars. And if you are still deciding whether knitting is the craft for you at all, our guide to how to start knitting a scarf is a friendly flat-knitting entry point before you add a second technique.
Three Methods for Knitting in the Round: DPNs, Circulars, and Magic Loop
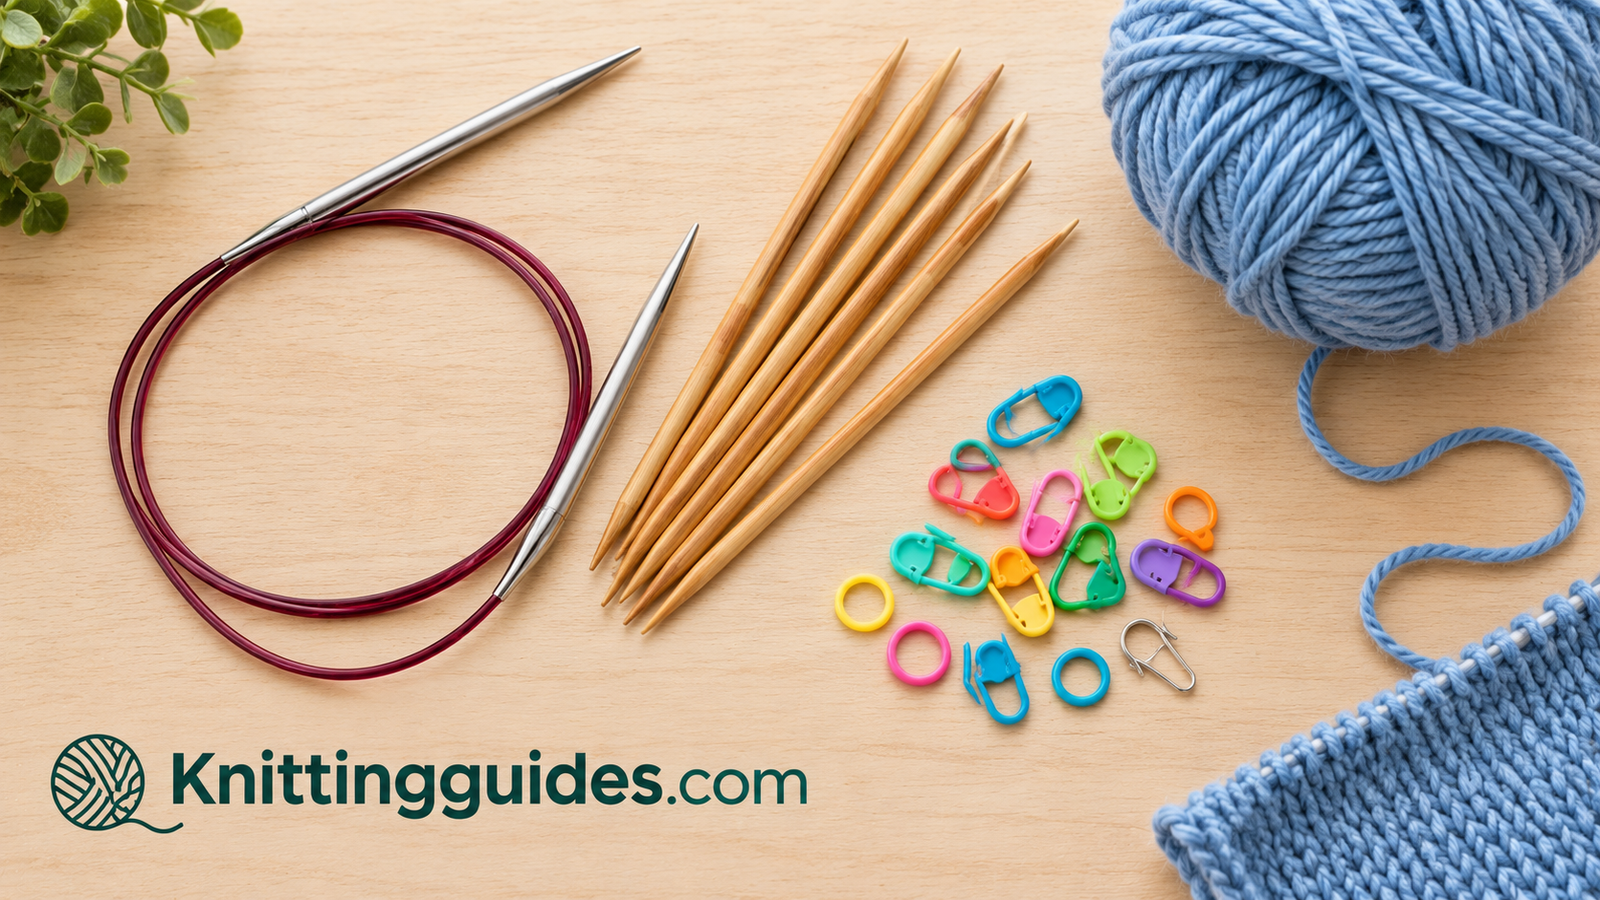
Every way of knitting in the round solves the same problem: how do you hold a small ring of live stitches without them sliding off the ends? Three solutions dominate modern knitting, and most knitters eventually learn at least two of them. Below is the honest comparison before we dig into each one.
Swipe to see more →
| Method | How it works | Best for | Learning curve | Watch out for |
|---|---|---|---|---|
| Circular needles (short cable) | Two tips joined by a flexible cable; stitches sit on the cable | Hats, cowls, sweater bodies, anything with a comfortable circumference | Very gentle — the closest thing to flat knitting | The cable length must suit the project circumference |
| Double-pointed needles (DPNs) | Three or four needles hold the stitches; a fifth works the yarn | Socks, mittens, fingers, small tubes, hat crowns | Moderate — managing several needles takes practice | Laddering at the gaps; stitches slipping off idle ends |
| Magic loop | One long circular needle with cable pulled out into two loops | Small circumferences using only one long circular | Moderate — the first few rounds feel fiddly | Uneven loops; cable memory in stiff cords |
| Two circulars | Two separate circular needles split the stitches in half | Small circumferences for knitters who dislike magic loop | Moderate | Keeping track of which needle is which |
Circular needles: the beginner’s best friend
A circular needle is simply two tapered tips connected by a flexible cable. For larger projects, the cable does all the work of holding the fabric’s weight — which is one of the quiet benefits of circular knitting, since the project rests in your lap instead of dragging on a straight needle. When the project circumference is close to the cable length, you work the stitches exactly as you would flat knitting, except you never turn the work.
For a very first round-knit project, a hat on a cable that matches the hat’s circumference is the smoothest introduction. The stitches fill the cable comfortably, the join is easy to see, and there is no extra technique to learn beyond the join itself. If you want a deeper dive into needle styles before buying anything, our comparison of circular vs straight knitting needles covers the trade-offs, and our roundup of the best knitting needles for beginners explains which materials feel friendliest in new hands.
Pros of circular needles
- Closest to flat knitting, so the transition is gentle
- Weight of the fabric sits in your lap, not on your wrists
- One tool handles both flat and circular work
- Ideal for hats, cowls, and sweater bodies
Cons of circular needles
- You need the right cable length for each circumference
- Cheaper cables can hold a coil shape that fights you
- Very small circumferences need magic loop or DPNs
Double-pointed needles: classic and compact
DPNs come in sets of four or five short needles with points at both ends. Three or four hold the stitches in a square or triangle, and the free needle works the yarn. It looks alarming in photographs and feels completely normal within ten minutes. DPNs remain the fastest method for very small tubes — sock cuffs, mitten thumbs, sleeve tops — because there is no cable to manage and no pulling of loops.
The trade-off is that gaps between needles can produce “ladders”: vertical bars of loose stitches where one needle ends and the next begins. We will fix that properly in a later section. If you want to explore sets that grow with you, an interchangeable knitting needle set pairs well with DPNs, and our Addi Click vs ChiaoGoo comparison looks at two of the most talked-about systems.
Magic loop: one needle, every circumference
Magic loop uses a single long circular needle — the kind with a cable long enough to circle your body — for a project much smaller than the cable. You cast on, split the stitches roughly in half, and pull the cable out into two loops at either end. Then you knit one half, rotate, and knit the other. It is a genuinely clever technique and it means you never have to buy a specific cable length again.
The downside is that the first two rounds are fiddly while the loops are still awkward, and stiff cables make it harder than soft ones. If you already own long circulars, magic loop costs nothing to try.
A simple rule of thumb
Use circular needles when the project is roughly the same size as the cable. Drop to DPNs or magic loop when the project gets noticeably smaller than the cable. That one rule covers almost every situation you will meet as a beginner.
Magic loop: one long circular needle, cable pulled out into two loops, stitches divided roughly in half.
Choosing Your Yarn, Needles, and First Project
The fastest way to enjoy circular knitting is to set yourself up for an easy win. That means choosing a project whose circumference matches a cable you own, and a yarn that forgives small inconsistencies in tension. Beginners are often tempted by delicate lace-weight yarn and complicated sock patterns; both are lovely later and frustrating now.
Pick the project before the yarn
For a first round-knit project, the classic trio is a cowl, a simple beanie, or a pair of fingerless mitts. A cowl is the most forgiving because it has no shaping at all — cast on, join, and knit ribbing or stockinette until you run out of yarn or patience. A beanie adds a small amount of decreasing, which is excellent practice. Mitts introduce small-circumference knitting and a thumb hole. Socks are absolutely doable as a first circular project, but they combine several new skills at once, so many teachers suggest a hat first.
Yarn that behaves well in the round
Look for a smooth, plied, medium-weight yarn in a light or medium solid colour. Smooth plies make your stitches easy to read, which matters enormously when you are counting rounds and spotting mistakes. Very dark yarn hides your stitch definition; fuzzy or heavily textured yarn hides everything, including errors you would want to catch early. A superwash wool or wool-blend in a worsted or aran weight is close to ideal.
Need a place to start? Our guide to the best yarn for beginner knitting explains fibre types and weights in plain language. The short version: pick something soft but not slippery, in a weight that matches the needle size printed on the label.
Needle size and the feel of the fabric
The yarn label suggests a needle size, and it is a reasonable starting point — but your hands are not the same as the designer’s hands. Knitters who hold yarn tightly often need a slightly larger needle to reach a comfortable fabric; loose knitters may need a smaller one. For a first project, err on the side of a fabric that drapes a little rather than one that feels stiff as cardboard.
If you are unsure what all the numbers mean, our guide to what size knitting needles for beginners walks through needle sizing for both US and metric systems, and how needle size interacts with yarn weight.
Your shopping list for a first round project
- One ball of smooth, light-coloured, medium-weight yarn
- A circular needle with a cable close to your project circumference
- One locking stitch marker to mark the beginning of the round
- A blunt yarn needle for weaving in ends
- A row counter or a scrap of paper and a pencil
If buying everything separately feels overwhelming, a kit takes the decision-making out of it. We reviewed several in our guide to the best knitting kits for beginners, and a good one will include exactly the items above.
Reading Patterns and Understanding Gauge in the Round
Patterns written for circular knitting have their own shorthand, and a few minutes spent understanding it will save you hours of confusion. The most common phrase you will meet is “worked in the round,” usually followed by something like “knit every round to 7 inches from cast-on edge.” That instruction is genuinely that simple — but only if you know how rounds are counted and how the marker behaves.
Rounds, not rows
When you knit flat, you count rows: one trip across the work equals one row. When you knit in the round, you count rounds: one complete circuit equals one round. Patterns usually tell you to place a marker at the beginning and to slip it from the left needle to the right needle as you come to it. Some patterns also use additional markers to divide the round into sections — for a hat, that might be four decrease sections; for a sleeve, two.
Keep a tally. A simple row counter that clicks as you slip the marker is ideal, but a notebook works just as well. The one habit that separates organised knitters from frustrated ones is marking off completed rounds as they happen, not trying to reconstruct them later.
Charts read the same way as the fabric
This is one of the great joys of circular knitting. Because the right side always faces you, a chart is read right to left on every round, and every square means exactly what it looks like. Contrast that with flat knitting, where wrong-side rows are read left to right and the symbols invert. If you have been intimidated by colourwork charts, knitting in the round removes half the difficulty before you start.
For a full walkthrough of pattern language — abbreviations, repeats, brackets, asterisks, and sizing notes — read our guide to how to read a knitting pattern. It pairs perfectly with this article, since most of the confusion beginners experience in circular knitting is pattern confusion rather than technique confusion.
Gauge behaves differently in the round
Gauge is the number of stitches and rounds per inch of fabric, and it determines whether your finished object fits. Here is the part that catches people out: many knitters purl looser than they knit, so their gauge when knitting flat differs from their gauge when knitting in the round. If a garment is knitted in the round but you swatch flat, your swatch may lie to you.
The solution is to swatch in the round. Cast on enough stitches for a generous square, join, and knit a tube — you will waste some yarn on the inside, but you will get an honest measurement. Then measure both stitch gauge and round gauge in the middle of the fabric, away from the edges.
Why gauge matters more than it seems
A difference of half a stitch per inch across a hat circumference is a couple of centimetres of fit. Across a sweater, it is the difference between a garment you wear and a garment you donate. Nobody loves swatching, but swatching in the round is a genuinely small price to pay for a project that fits.
Worth remembering too: circular needles are not only for circular knitting. Plenty of knitters use them for flat projects because the cable carries the weight of the work. That versatility is one reason so many people upgrade to a full set; if that sounds like you, start with our comparison of interchangeable knitting needle sets.
Casting On for Circular Knitting
Almost any cast-on will work for knitting in the round, but the long-tail cast-on remains the favourite: it produces an edge that is elastic enough to stretch over a head and tidy enough to look deliberate. The one thing to know is that your first round will be worked along the cable rather than along a rigid needle, so it helps to cast on with a slightly relaxed hand.
Estimate your tail and cast on
Measure a tail roughly three times the width of your finished piece — for a hat brim, that is usually around a metre and a half of yarn. Make a slip knot, place it on one needle tip, and work your long-tail cast-on across the needle and onto the cable as the number of stitches grows. Keep the tension even and a touch loose: the first round of circular knitting always feels tight, and a generous cast-on gives you room to settle.
Stitches gather on the needle and the cable; the tail hangs at the start of the row, the working yarn stays attached to the last stitch.
What to watch for: the loops should sit side by side without overlapping, and none of them should be dramatically tighter than the others. If the first few feel uneven, pull them out and rework them — you will never get a better chance to fix the edge.
Spread the stitches along the cable
Once all your stitches are on, slide them down so they rest on the flexible cable rather than bunched against one needle tip. This is not cosmetic: it gives you a clear, flat cast-on edge to inspect in the next step, and it makes the first round far less cramped. If the cable is coiled from packaging, let the needle hang by the work for a minute or two so the coil relaxes.
Checking Your Cast-On for Twists (The Step Nobody Regrets)
This is the single most important moment in the entire process, and it takes about thirty seconds. If the cast-on is twisted when you join, the twist is permanent — it will form a spiral ridge up the entire length of your work, and the only fix is to unravel and start again. Experienced knitters still check every single time.
Lay the cast-on along the cable in one straight line
Hold one needle tip in each hand and let the cable fall into a gentle arc in front of you. Run a finger along the cast-on edge, from the tail end to the working-yarn end. Every loop should hang from the cable in the same direction, with the neat lower edge forming one continuous, unbroken line. If any stitch has rotated around the cable, you will see the bump immediately.
A twisted cast-on is obvious once you look for it: one or more loops have rotated around the cable.
What to watch for: the lower edge of the loops should read as one unbroken line all the way along the cable. This is easier to see on a smooth cable than on a bumpy one, which is one more reason beginners tend to have a better time with quality needles.
Align the needle tips with the working yarn at the back
Bring the two needle tips together, side by side and pointing in the same direction, with the working yarn hanging at the back and to the right. The last stitch you cast on should sit on the right-hand needle tip, and the tail should hang from the far left. Once you have this arrangement, hold the tips firmly — this is the position you will be in when you make the join.
Joining in the Round
The join is where the ring closes. It sounds dramatic; in practice it is one ordinary knit stitch, followed by a marker. Once that first stitch is worked and the marker is in place, the knitting has officially become circular. Everything after that is familiar.
Knit the first stitch and place the marker
With the tips held together and the yarn at the back, insert the right needle tip into the first stitch on the left needle and knit it as usual. The working yarn — coming from the last cast-on stitch — naturally crosses behind and forms the join. Now place a locking stitch marker on the right needle. That marker is the beginning of your round, and it stays there for the rest of the project.
The join closes the ring: one knit stitch carries the working yarn across the gap, then the marker goes on the right needle.
What to watch for: keep the first two or three stitches comfortably snug — not tight, just firm. If the join is loose, a small hole appears at the start of the round. Tightening the first couple of stitches on every round for the first inch solves it permanently.
Continue the round back to the marker
Work to the end of the stitches on the left needle, then keep going — the first stitches you knit are now waiting on the cable and you simply knit into them as well. When you reach the marker, slip it from the left needle to the right needle without knitting it. You have completed one full round.
A note on the visible “seam”
Where the join happens, a small jog can appear in ribbing or stripes. In plain stockinette it is usually invisible. Later you can tidy it with a jogless stripe technique or by shifting the beginning of the round, but for a first project, do not worry about it at all.
Working Your First Rounds: Markers, Counting, and Even Tension
The middle of a round-knit project is delightfully repetitive. Your job now is simply to build rounds evenly, keep count, and prevent the two problems that appear most often: laddering at needle joins and a gradually tightening or loosening tension as your hands relax.
Let the tube form and stop fighting the yarn
After four or five rounds, a distinct tube will appear, and the fabric will hang from the cable in a way that suddenly feels right. Resist the urge to over-tighten; circular knitting has less “give” at the beginning simply because the stitches are crowded on a cable. Relax your grip and let the yarn flow.
Rounds stack upward from the cast-on edge; the marker stays at the beginning of every round.
What to watch for: your stitches should form even little “V” shapes with no obvious tight or loose columns. If one column is visibly looser than its neighbours, that is laddering — see the next step.
Prevent ladders at needle joins
Laddering is a column of stretched stitches that appears where one needle ends and the next begins. It happens because the gap between needles is pulled slightly open with each pass. The classic fix is beautifully simple: after knitting the first two stitches on each new needle, give the working yarn a firm tug to snug them up. Not the first stitch — the second one, because tightening the first leaves the slack sitting in the next stitch instead of disappearing.
The gap between needles stretches the two stitches beside it. Tightening the second stitch on each new needle removes the slack.
What to watch for: do not pull hard enough to pucker the fabric. A gentle, consistent snugness at the same point in every round is exactly right.
Counting rounds without losing your place
Marking off rounds is unglamorous and completely transformative. Use a clicker counter that you advance when you slip the marker, or simply tick a tally on paper. For projects with shaping, write the round number on a sticky note and attach it to your work. If you do lose count, count up from the cast-on edge by measuring instead: lay the fabric flat and compare its length to the pattern’s instructions. It is faster than counting eighty rounds one by one.
Good lighting helps more than people expect when you are counting stitches and reading texture. If you knit in the evenings, it is worth looking at a dedicated light — our review of the best knitting light covers neck lights, clip lamps, and floor lamps.
Shaping the Fabric: Increases, Decreases, and Crown Shaping
Now that your tube is growing, you can start to give it shape. Shaping in the round uses exactly the same increases and decreases as flat knitting — what changes is where you place them and how they read in the finished fabric. Because the right side always faces you, leaning decreases are wonderfully intuitive: a decrease that leans right will look like it leans right.
Decrease evenly to shape a hat crown
The most common beginner shaping is the crown of a beanie. You divide the round into equal sections — often four or eight — place a marker at each division, and work a decrease just before or after every marker on designated rounds. Between decrease rounds you knit plain. The fabric gathers smoothly toward the centre, and when only a few stitches remain, you cut the yarn and draw it through them.
Place decreases just before each marker; the crown gathers evenly toward the centre as the rounds build.
What to watch for: check the fabric every few decrease rounds. If a section looks noticeably tighter than the others, you may have accidentally worked a decrease where none was written. It is far easier to fix now than after three more inches.
Increase to shape a mitten or thumb gusset
Increases in the round work the same way as decreases in reverse: a yarn-over makes a small decorative hole (good for lace, less good for a thumb gusset), while a make-one or knit-front-and-back adds a stitch invisibly. For garments and mittens, make-one increases are the standard because they create a smooth, hole-free line of new stitches.
A gusset grows as new stitches appear on either side of a marked section — the same principle shapes sleeve increases.
What to watch for: when you increase at the beginning and end of a section, place them consistently relative to the marker. Symmetry is what makes shaping look intentional rather than accidental.
Two decreases you will use constantly
Knit two together (k2tog): insert the right needle through two stitches at once and knit them as one. The resulting decrease leans to the right.
Slip, slip, knit (ssk): slip two stitches knitwise one at a time, return them to the left needle, then knit them together through the back loops. It leans to the left. Pairing k2tog and ssk on either side of a shaping line creates a tidy mirrored effect.
Binding Off and Finishing Your Work
Binding off in the round is identical to binding off flat, except that the result forms a closed ring. The main thing to remember is tension: a bind-off that is too tight will fight the elasticity of ribbing and make a hat brim impossible to pull over a head.
Bind off with a relaxed hand
Knit two stitches, then pull the first stitch over the second and off the needle. Knit one more, and repeat — each time passing the older stitch over the newer one. Keep the loops on the right needle generous; many knitters deliberately use a needle one size larger for this step so the edge stays stretchy. When one stitch remains, cut the yarn leaving a tail of about fifteen centimetres, and pull the tail through the last loop to lock it.
Each older stitch passes over the newer one; the final tail is threaded onto a blunt needle and woven into the fabric.
What to watch for: if the edge looks visibly tighter than the fabric below it, undo it and rework with a larger needle. Binding off is one of the few finishing steps you can redo without damaging the knitting.
Weave in the ends so they stay put
Thread the tail onto a blunt tapestry needle and weave it through the backs of the stitches, following the path of the yarn for about five centimetres. Try to travel in two directions — one short run one way, then back the other — so the end cannot work loose with wear. For ribbing, weave the tail vertically along a column of stitches where it will be invisible from the right side.
If you want a fuller walkthrough of finishing techniques, our guide to how to cast off knitting covers several stretchy bind-offs that work beautifully on hat brims and sock cuffs.
Troubleshooting the Problems Beginners Actually Hit
Every technique has its characteristic stumbles, and circular knitting has a small, predictable set. None of them are signs that you are bad at this. All of them have straightforward fixes, and knowing them in advance will save you from the particular despair of discovering a mistake three inches too late.
A twist has appeared in the work
If you spot a spiral ridge running up the tube, the cast-on was twisted at the join. There is no cosmetic fix. The good news: you found it early. Pull back to the cast-on, straighten the edge carefully, and rejoin. After this happens once, you will never skip the alignment check again.
A gap or hole at the beginning of the round
This is a loose join, and it usually resolves with tension rather than technique. On the first three rounds, give a firm tug after working the first two stitches of each round. If a small hole is already established, you can close it later when you weave in the tail by threading the yarn through the loose stitch and pulling gently.
Ladders running up the fabric
Covered in step four: tighten the second stitch at every needle join. Another helpful habit is to shift the joins by a stitch or two every few rounds, so any residual slack is distributed instead of stacking into a visible column.
Dropped stitches
Dropped stitches happen to everyone, and in circular knitting they are just as easy to rescue as in flat work — sometimes easier, because the fabric is stable and does not need turning. Use a crochet hook to catch the loose loop, then work back up the ladder of horizontal bars, pulling each one through the loop until you reach the live row. Place the rescued stitch back on the left needle and continue.
A crochet hook turns a dropped stitch into a two-minute repair: catch the loop, work up the ladder, return it to the needle.
For a complete repair library — including fixing a split stitch, correcting a mis-crossed cable, and unpicking a whole round — read our guide to how to fix mistakes in knitting.
Your hands hurt or the yarn keeps splitting
Hand fatigue usually comes from tension that is too tight, needles that are too grippy, or sessions that are too long. Try wooden or bamboo needles if metal feels slippery and uncontrolled, or smooth metal if wood feels draggy. Take breaks. And consider the quality of your light: squinting at dark yarn is a fast route to a stiff neck and sore shoulders.
Travelling with a project in progress
Circular projects travel beautifully — the stitches sit safely on the cable and are far less likely to slip off than on straight needles. If you are knitting on the move or in the air, it is worth checking the rules beforehand; our article on bringing knitting needles on a plane covers what is generally permitted and how knitters usually pack.
The one thing worth being strict about
Never continue past a suspected twist “to see if it works out.” It does not work out. Thirty seconds of inspection at the join is worth more than three hours of knitting that has to be unravelled.
Your First Five Projects and a Simple Practice Plan
The fastest way to make circular knitting feel automatic is to use it — repeatedly, on small, satisfying projects that build one skill at a time. Here is a progression that most teachers would recognise, ordered so that each project adds exactly one new thing.
1. A simple cowl: join, knit, bind off
A cowl is a tube of knitting with no shaping and no counting. Cast on enough stitches to circle your neck comfortably, join in the round, and work knit two, purl two ribbing or plain stockinette until the piece feels like a cowl. Bind off. That project teaches the join and the rhythm of rounds without any other demands.
2. A ribbed beanie: joining, decreasing, closing
A hat adds one skill — decreasing. Work a ribbed brim, switch to stockinette for the body, then decrease across four or eight sections to close the crown. This is the project where circular knitting stops feeling like a technique and starts feeling like garment construction.
3. Fingerless mitts: small circumference and a thumb
Mitts introduce either DPNs or magic loop, a small number of stitches, and a thumb gusset with increases. Expect the first few rounds of the cuff to feel awkward regardless of method; that passes quickly.
4. A pair of socks: everything at once
Socks combine ribbing, leg, heel flap, gusset decreases, foot, and toe. They are genuinely achievable for a determined beginner, and many knitters learn best by tackling something that rewards persistence. If socks are the reason you picked up knitting, go for it — just know you will learn more than one new thing.
5. A seamless sweater or a colourwork cowl: circular knitting as construction
Once rounds feel natural, seamless garments are the natural next step. A top-down yoke sweater or a stranded colourwork cowl shows off the biggest advantage of knitting in the round — colourwork charts read exactly as the fabric appears, with no wrong-side rows to interpret.
If flat projects still call to you between rounds, our guide to how to start knitting a scarf is a pleasant, low-stakes companion project.
A two-week practice plan
- Days 1–2: cast on, check for twists, and join. Unravel and repeat three times until the process takes under five minutes.
- Days 3–5: knit a small tube in stockinette. Focus purely on even tension and comfortable hands.
- Days 6–7: practise the ladder-prevention tug at every join until it is automatic.
- Days 8–10: work a decrease round and an increase round on scrap yarn to see how shaping behaves.
- Days 11–12: bind off, weave in ends, and examine the fabric critically. Note what you would change.
- Days 13–14: start the cowl or beanie you actually want to wear.
Why the practice is worth it
Beyond the finished objects, knitting has a reputation for being genuinely good for focus and calm, and there is reasonable research interest around repetitive craft and stress. If you are curious about the wider benefits, our article on whether knitting is good for the brain looks at what is known and what is still anecdotal. Either way, most knitters agree that twenty quiet minutes with a round of plain knitting is a decent way to end a loud day.
Thinking about where this goes next
Once circular knitting is second nature, many knitters explore the wider fibre world — spinning their own yarn or adding a machine for faster plain knitting. If that rabbit hole appeals, our guides to the best spinning wheels for beginners and the best knitting machines are honest starting points.
Frequently Asked Questions
Is knitting in the round harder than knitting flat?
No — it is different for about fifteen minutes and then usually easier. The cast-on behaves slightly differently, and the join needs attention, but stockinette in the round is simply knitting every stitch of every round. Many knitters find it faster and more relaxing than flat knitting once the technique settles into their hands.
What is the easiest way for a beginner to knit in the round?
Start with circular needles and a project whose circumference roughly matches the cable — a cowl or a beanie. That combination means you never have to manage multiple needles or pull cable loops, so the only new skill is the join. Save magic loop and DPNs for your second or third round-knit project.
How do I stop my knitting from twisting when I join?
Before joining, lay the cast-on along the cable in one straight line and run a finger along the lower edge. Every loop should face the same direction and the edge should read as one unbroken line. Then hold both needle tips together with the working yarn at the back and knit the first stitch. It takes about thirty seconds and prevents the only mistake in circular knitting that cannot be fixed later.
Can I use circular needles for flat knitting?
Absolutely, and many knitters prefer them. The cable holds the weight of the work, which is easier on the wrists, and you simply turn the work at the end of each row as usual. If you are weighing the two styles, our comparison of circular vs straight knitting needles goes into the practical differences.
What size circular needle should a beginner buy first?
Choose the cable length to match the project’s circumference and the needle size to match the yarn. For a first hat, that is typically a shorter cable sized to a head circumference, paired with a medium-weight yarn. Our guide to needle sizes for beginners explains the sizing systems in detail.
What is the difference between knitting in the round and magic loop?
Magic loop is one method of knitting in the round. It uses a single long circular needle with the cable pulled out into two loops so you can work a small circumference — a sock, a mitten, a sleeve — without buying a shorter needle. “Knitting in the round” is the general technique; magic loop, DPNs, two circulars, and short circulars are all ways of doing it.
Why does my circular knitting have ladders or loose columns?
Ladders form at the gaps between needles, where the two adjacent stitches get stretched on every pass. Fix it by giving a firm tug after the second stitch on each new needle, and by shifting the joins by a stitch or two every few rounds so any slack spreads instead of stacking.
Do I need double-pointed needles as well as circulars?
Eventually, it helps to have a way to knit very small circumferences — mitten fingers, sock toes, hat crowns. DPNs and magic loop are the two common answers. If you already own a long circular needle, try magic loop first and only buy DPNs if you find it awkward.
Should I purl at all when knitting in the round?
Only when the stitch pattern calls for it. Stockinette in the round is knit every round; garter stitch in the round is one knit round alternating with one purl round; ribbing alternates knit and purl stitches within each round. So purling disappears for stockinette but returns for texture.
How do I count rounds in circular knitting?
One complete circuit equals one round. Slip a marker at the beginning and advance a row counter as you pass it. If you lose track, measure the fabric from the cast-on edge and compare it with the pattern — for most projects, measuring is faster than counting dozens of rounds one at a time.
Can beginners knit socks in the round?
Yes, with the understanding that socks combine several new skills at once — ribbing, a heel, gusset shaping, and a toe. Many beginners succeed with a first pair, but a hat or cowl teaches the same circular skills with less simultaneous learning. It depends how much you enjoy a challenge.
What yarn is best for learning to knit in the round?
A smooth, plied, medium-weight yarn in a light or solid colour. It shows stitch definition clearly, is easy to unpick if needed, and behaves predictably on the cable. Very dark, fuzzy, or highly textured yarn hides exactly the details you need to see while learning. Our guide to the best yarn for beginner knitting has specific guidance.
Final Thoughts: You Only Have to Learn This Once
Knitting in the round has a reputation for being a milestone technique, and in a way it is — but the milestone is smaller than it looks from the outside. Cast on with a relaxed hand. Lay the edge along the cable and check for twists. Knit one stitch, slip a marker onto the right needle, and keep going. Tighten the second stitch at every join, count your rounds, and let the tube form.
Everything else — hats, socks, sleeves, yokes, seamless sweaters — is built from those few actions, repeated with minor variations. The method you choose, whether circular needles, double-pointed needles, or magic loop, matters far less than simply starting. Most knitters end up comfortable with two of the three anyway, switching between them depending on the project.
If there is one habit worth carrying forward, it is this: inspect the fabric as it grows. Circular knitting hides mistakes less obviously than flat knitting, because the wrong side is tucked away inside. A quick look at the outside of the tube every few rounds catches almost everything early.
And if you are still gathering your tools, there is no need to buy everything at once. One circular needle, one ball of smooth yarn, one marker, and one blunt needle will carry you through a cowl or a beanie. Start there. The rest of the collection can arrive slowly, as your curiosity does.